Sweet Potatoes – Backyard Style
Yes, readers, there is a Harvest Manager. The last several weeks have been occupied with recuperation from major knee surgery under the attentive care of the Gardener. I felt well tended, warmly covered, fed, and watered resulting in a fruitful recovery. I’m back in business and ready for the next harvest.
The last harvest came in during the recuperation period, so the Gardener was on his own for management. He did a good job on what turned out to be a fairly high stakes process. Deciding that the sweet potatoes had been given all of the time they would get for growth and maturation, the Gardener began to dig. He brought in roughly two five gallon buckets of various sized tuberous roots. It turns out that in order for sweet potatoes to take on their sweet taste and to store for any length of time, they need to be ‘cured’. Curing involves 7 – 10 days in a humid (90-95%), warm (85+ degrees) place. During this time the harvest wounds can heal while the roots develop a tougher skin and sweeter flavor.
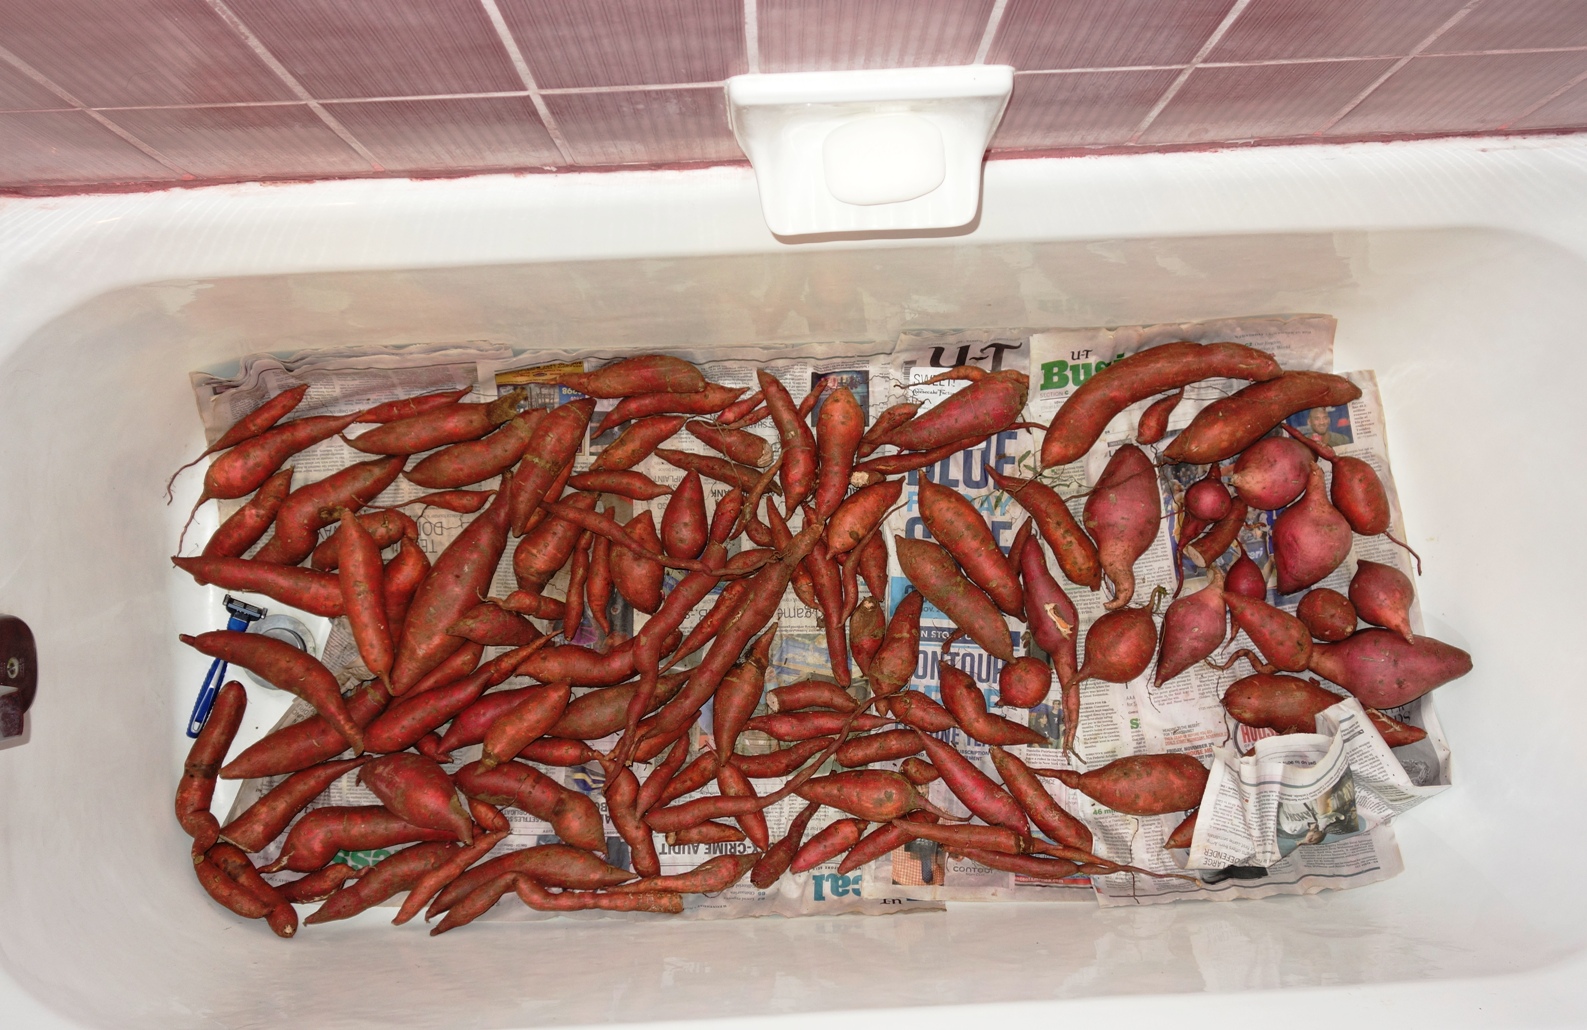
Sweet potatoes curing
Outside of the deep south (read that Louisiana, Mississippi, and Alabama) the right curing environment must be created, as it does not exist in nature. Thus, the Gardener created a sweet potato curing shed in the upstairs bathroom with a space heater and a humidifier. Ten days and numerous kilowatts later, the deed was done and the harvest was managed. It appears to have been worth it. The sweet potatoes are quite flavorful and look like they will store throughout the winter.
Mission accomplished.
Freeze, Dry, Make Gourmet Oils, Make Simple Syrups
 The backyard gardener is not the only one facing an abundant harvest this time of year. Camp Stevens, an Episcopal camp and conference center in the mountains of San Diego County California grows a great deal of the food eaten at Camp. Apparently they too have had a great year in the garden. The camp blog offers some tips for easily managing the harvest. Rather than repeat the information here (that could be some kind of plagiarism, I’m not sure) this Harvest Manager points you to the Camp Stevens blog where you can get all kinds of tips for freezing tomatoes, making herb infused olive oil in recipe sized portions, drying vegetables in bite-sized pieces, and creating herbed simple syrups for beverages and baking.
Food Swap Network
We’ve talked about food swaps before in Save the Harvest. It’s such a good idea, and it seems to be catching on. Food Swap Network is a nonprofit organization that provides resources to folds looking to join or start a local food swap. Here’s what the Food Swap website says:
“A food swap is a recurring event where members of a community share homemade, homegrown, or foraged foods with each other. Swaps allow direct trades to take place between attendees, e.g., a loaf of bread for a jar of pickles or a half-dozen backyard eggs. Swap events also include a potluck as an immediate food-sharing (and sometimes item-sampling) component. These events are a delicious way to diversify the homemade foods in your own pantry while getting to know members of your local food community.”
According to Food Swap Network there are two swaps meeting near me. Anyone ever been to a food swap? Any stories to share? Do you think The Harvest Manager should check it out?
Winding Down the Summer Harvest
The Gardener has been out of town all week. As a result, the produce coming into the kitchen has been nil. This afternoon the Harvest Manager got curious about how things were 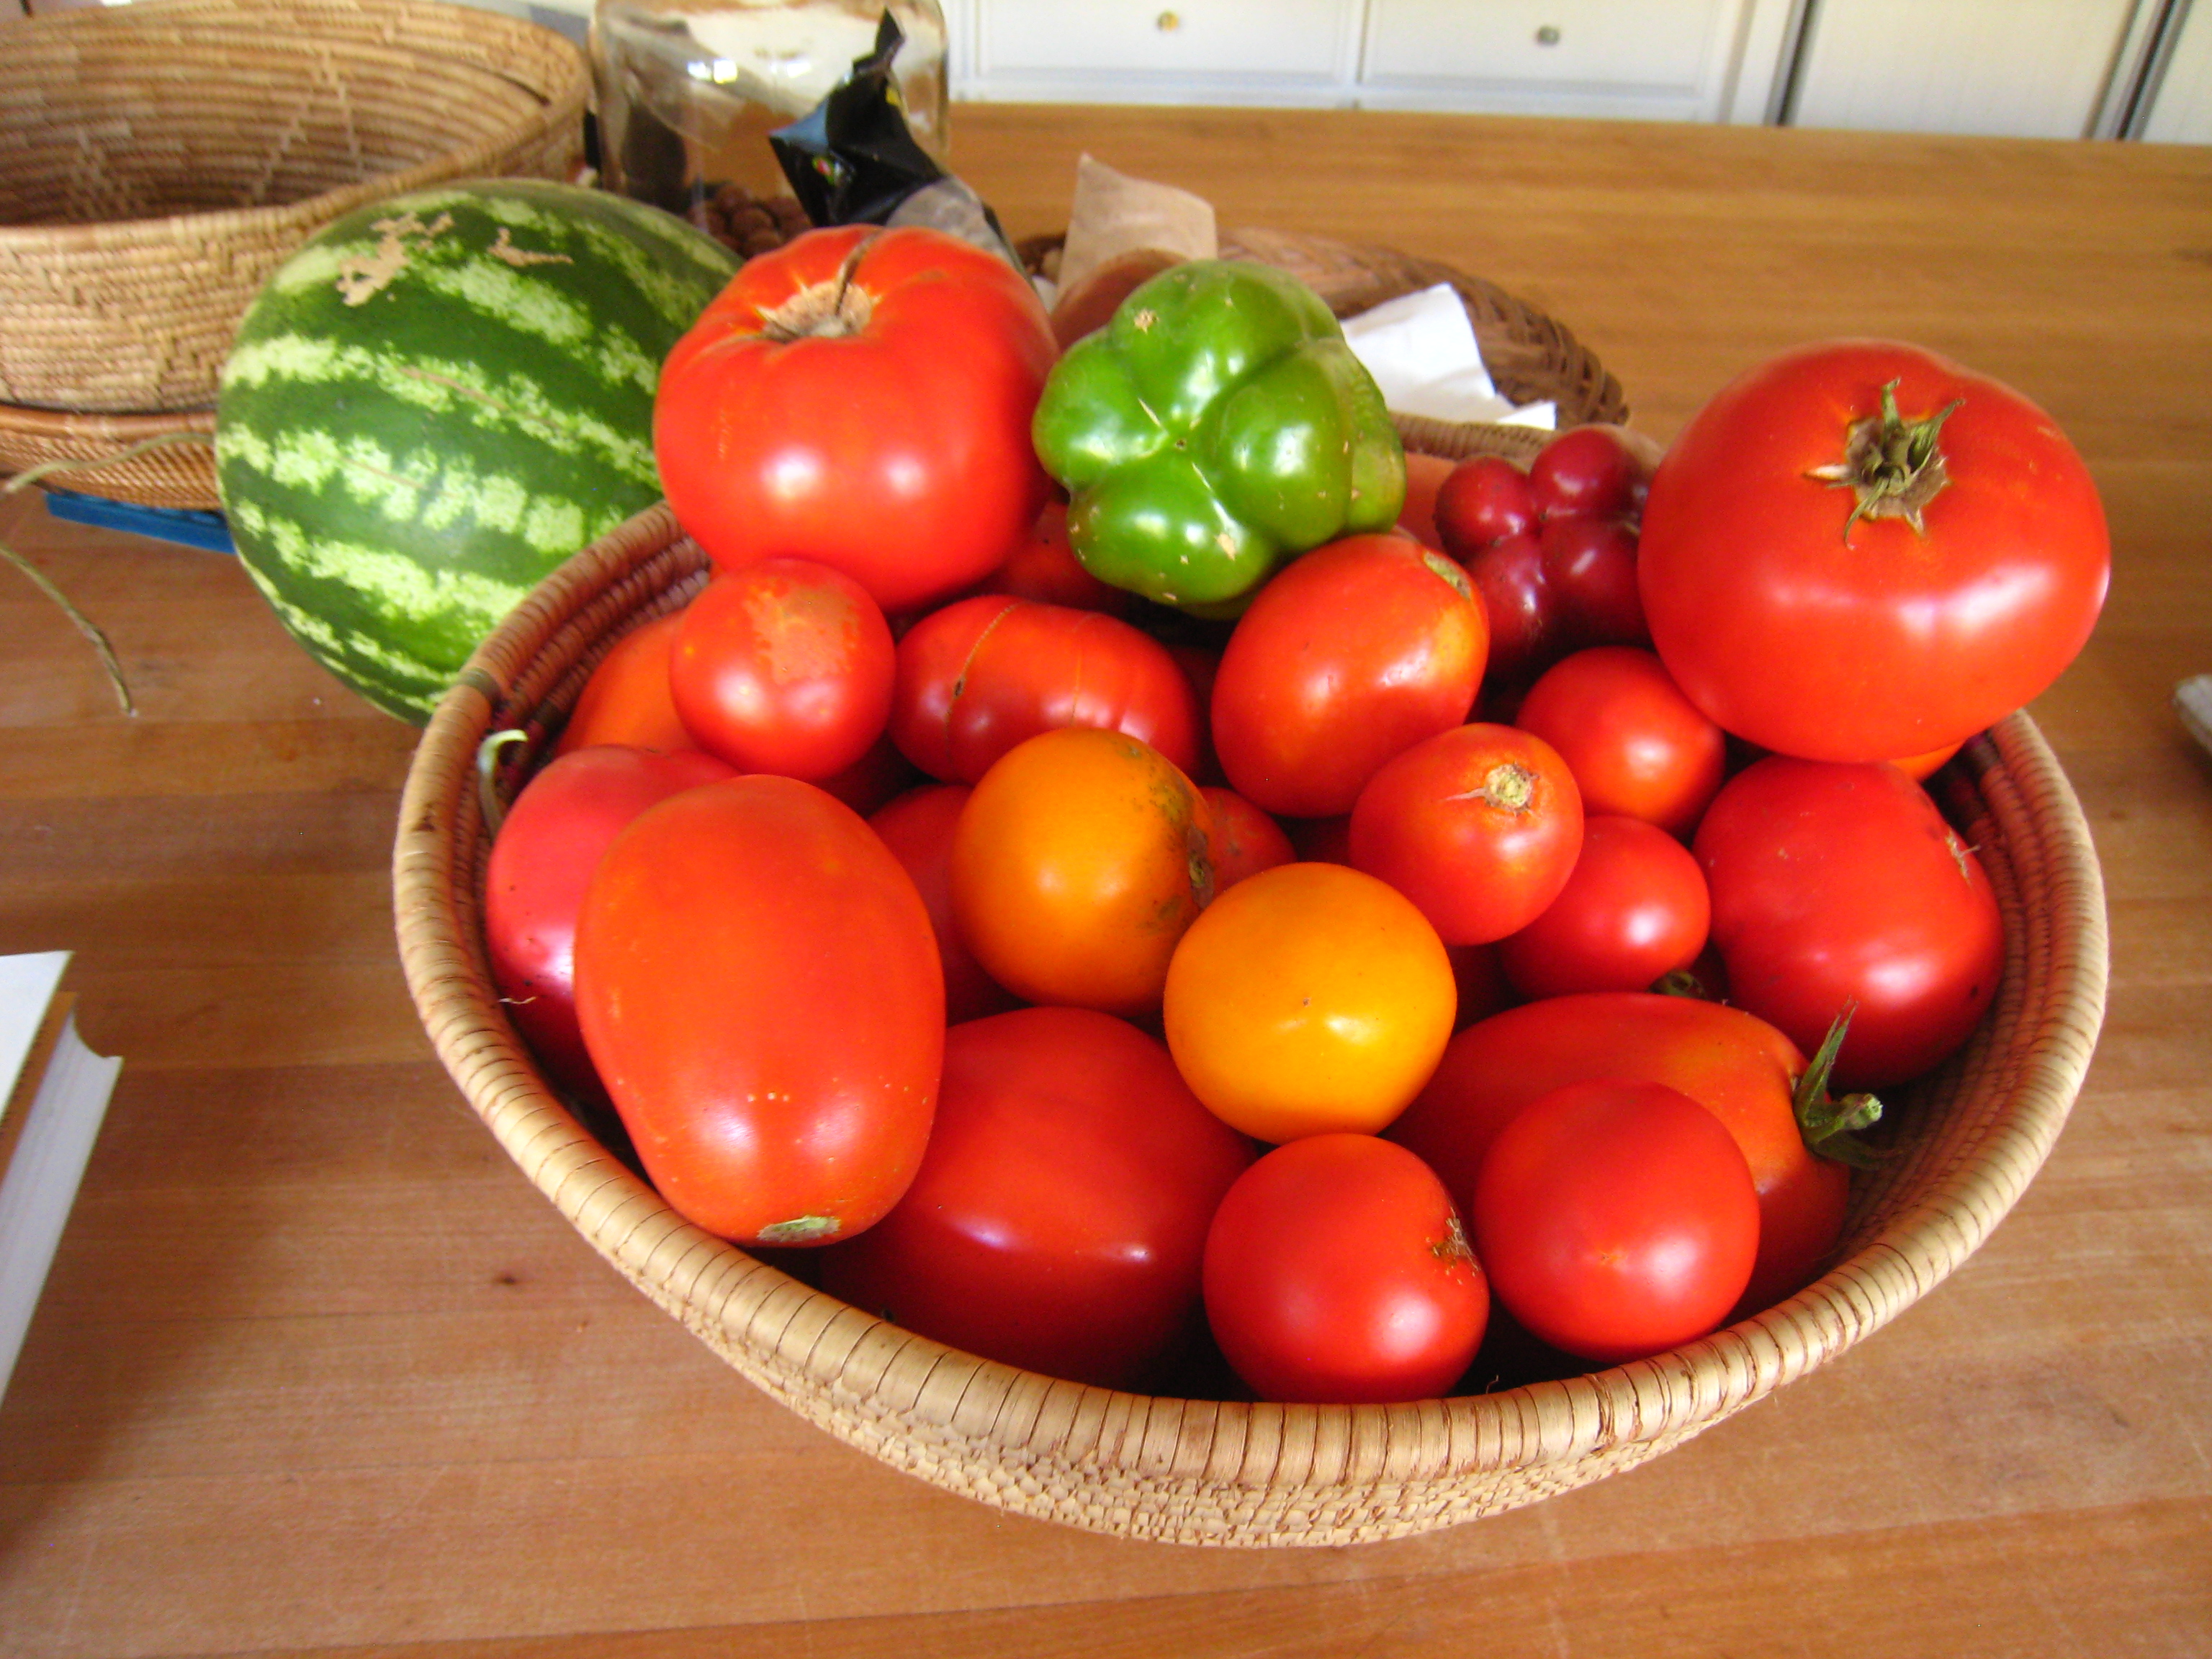 going out there. Was there anything to pick? Sure enough, the tomato crop continues to trickle in. A mega hot spell at the end of August seemed to put the kibosh on the tomato harvest, but it turns out I could pick at least a basket full. Thankfully, there’s room in the freezer for one more batch of stewed tomatoes. (The Gardener harvested the watermelon before he left. If it’s anything like its vine mate, we’re looking forward to a very sweet, juicy taste treat.)
Stewed Tomatoes
Dip the tomatoes in boiling water to loosen the skins. Move the tomatoes to cold water, then slide off the skins. Chop some celery and onions, saute them gently in butter, then add the peeled tomatoes. Bring to a boil, turn down, and simmer until the tomatoes have reached a consistency that you like. Usually it takes about an hour for my tastes. Add some salt, and you’re all done. Approximate quantities:
3 quarts of peeled tomatoes
2 ribs of celery
one small onion
2 tbs of butter
1/2 tsp of salt
Grape Harvest Winds Down
The grape harvest is winding down. The Thompson seedless and Red Flames have become raisins. The Concords are becoming fruit leather. An abundance of all varieties have made their way into the kitchens of family, friends, and the church coffee hour. Thank goodness for the dehydrator.
Having said that, in the middle of managing the grape harvest our 25 year old food dehydrator gave up the ghost. The heating element seems to have burned out in the middle of a batch of grape fruit leather.
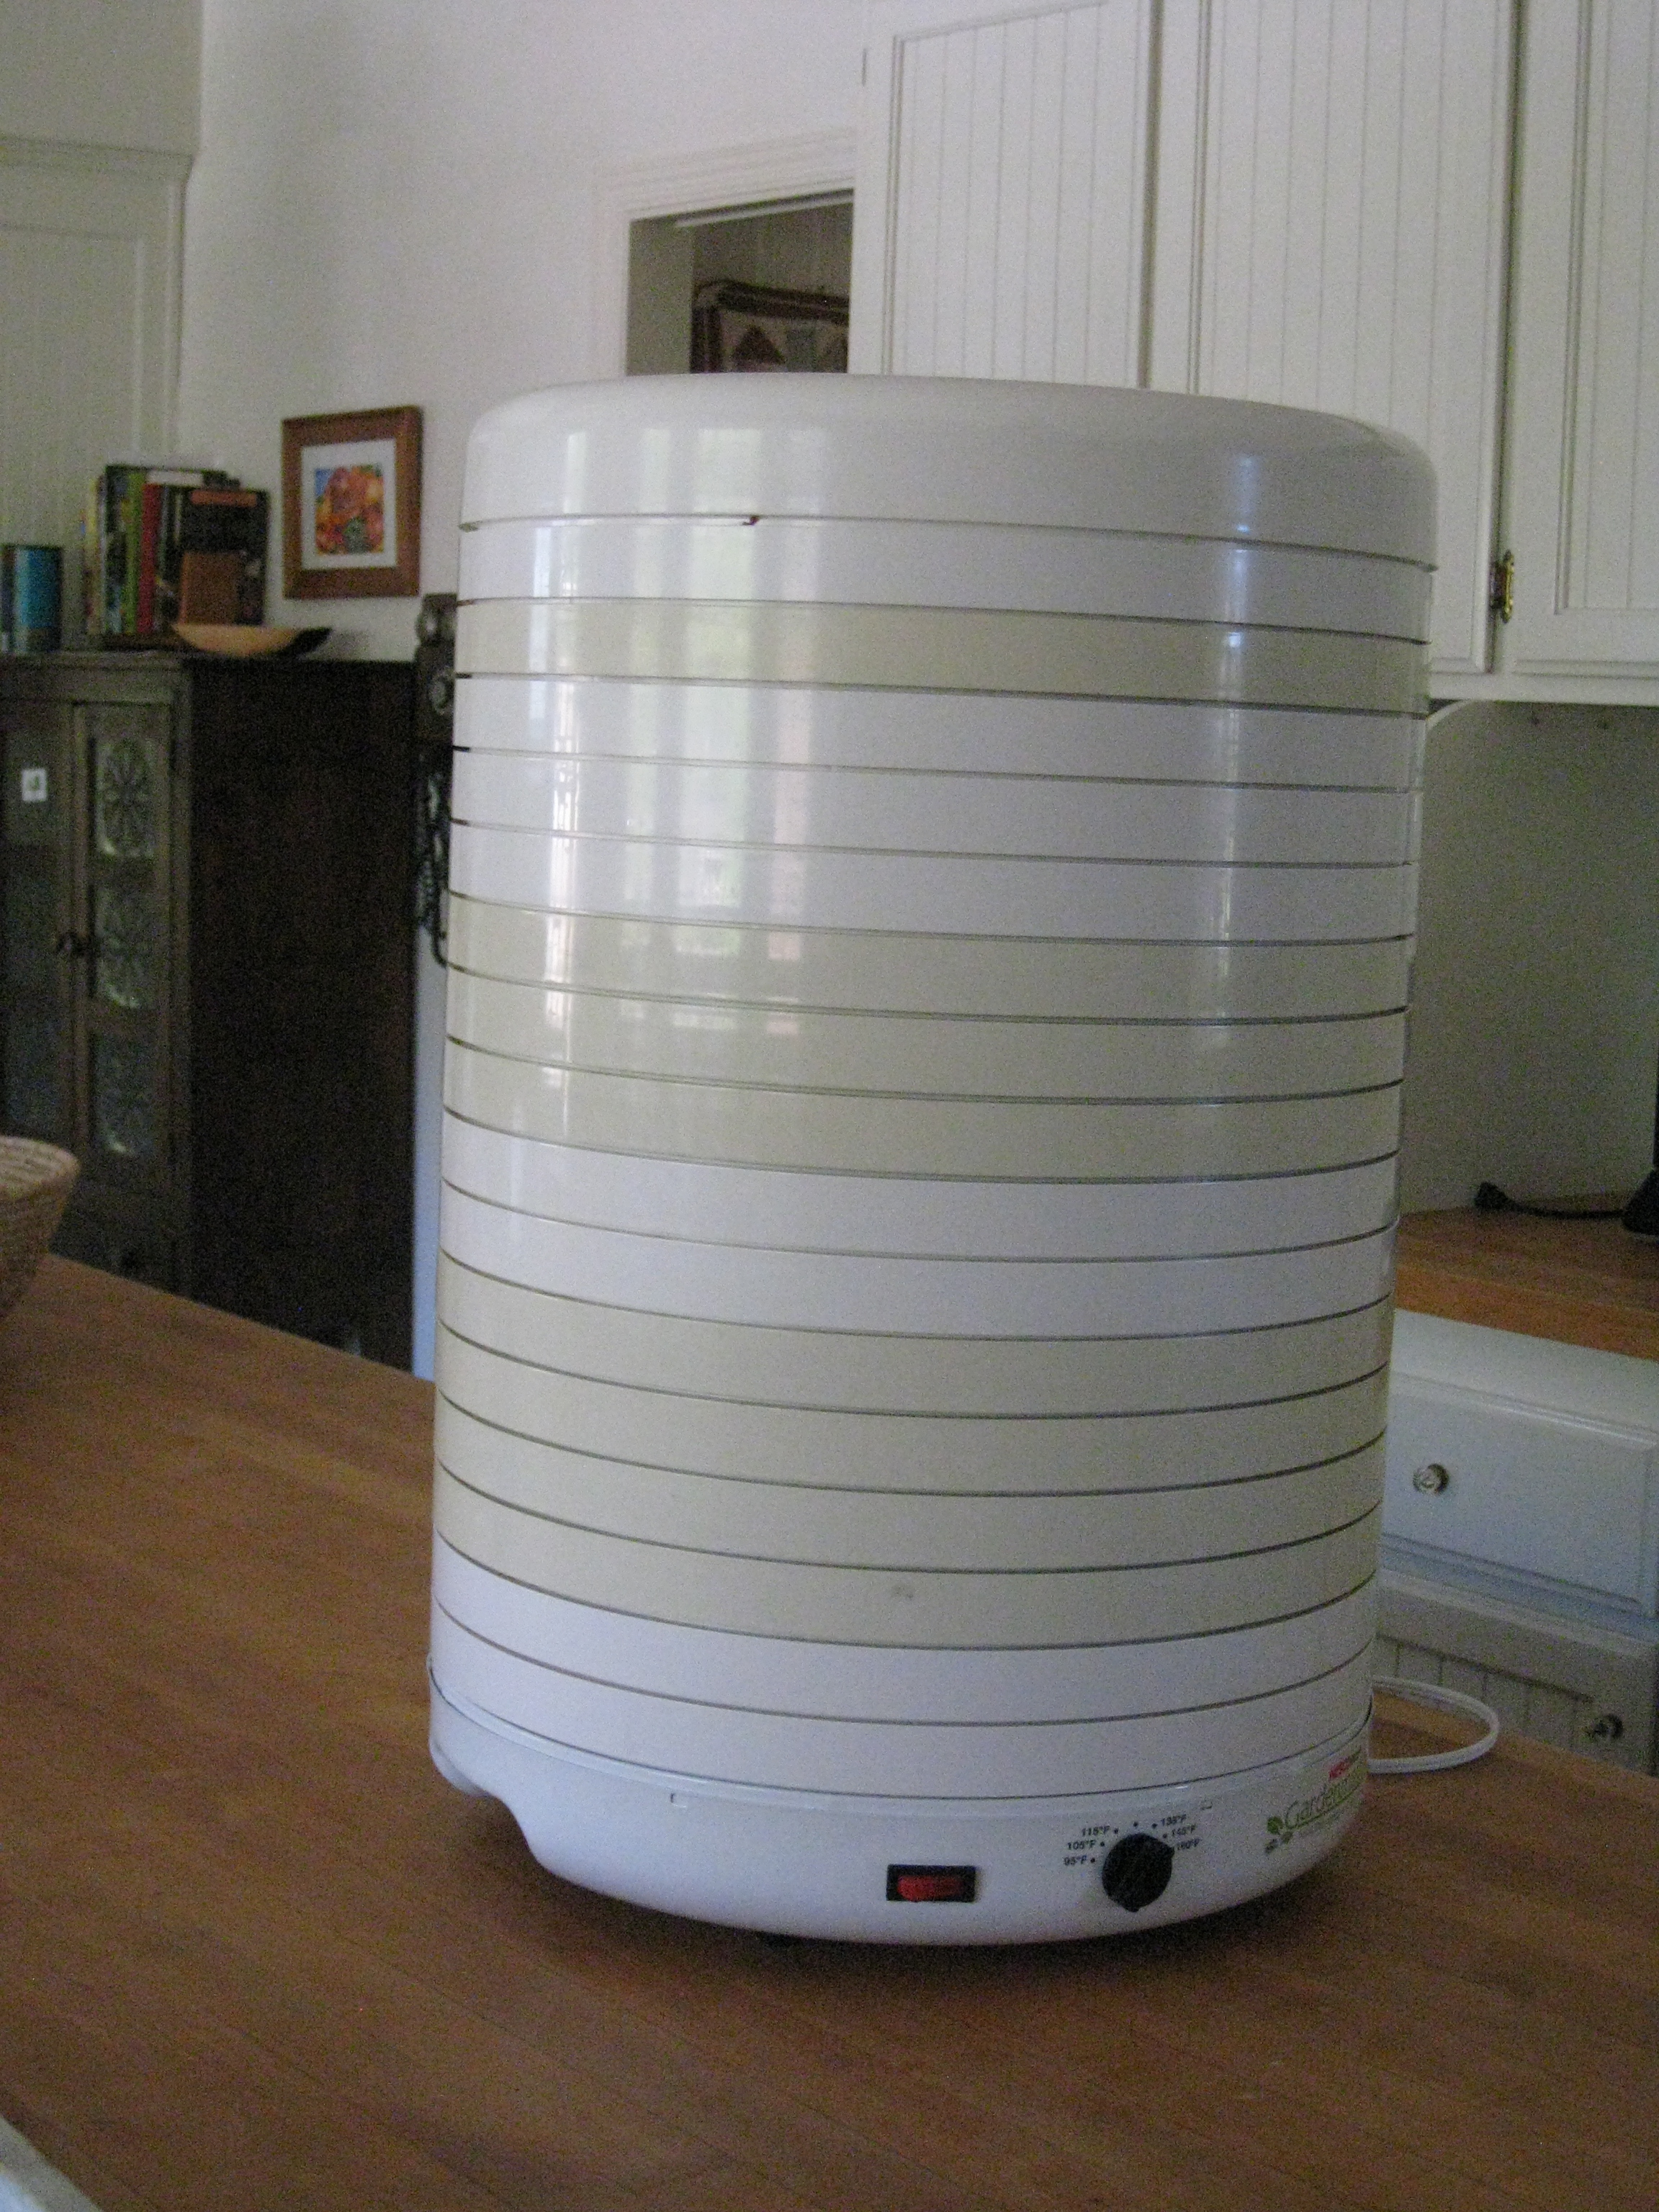
Nesco/American Harvester dehydrator with 16 trays.
Our American Harvester food dryer gave us years of uninterrupted service, so I can’t really complain. Happily, our dehydrator of choice seems to be still on the market under the name Nesco/American Harvester. Within a few days this beauty arrived on our doorstep. (The Gardener is a wiz at online shopping.)
Notice that it has 16 trays. Apparently it has the capacity to deal with 30+ trays, but the Harvest Manager plans to hold the line at 16. The variation in colors reflects the original trays (darker) and the new trays (whiter). So far we’ve dried bay leaves, marjoram, and lots of grape fruit leather in the new dehydrator. Works like a charm. This grape leather was ready to roll in about four hours. To store we cut it into serving sized pieces, roll it in wax paper, and store it in an air tight container. Ready for the next hike or the next visiting niece.
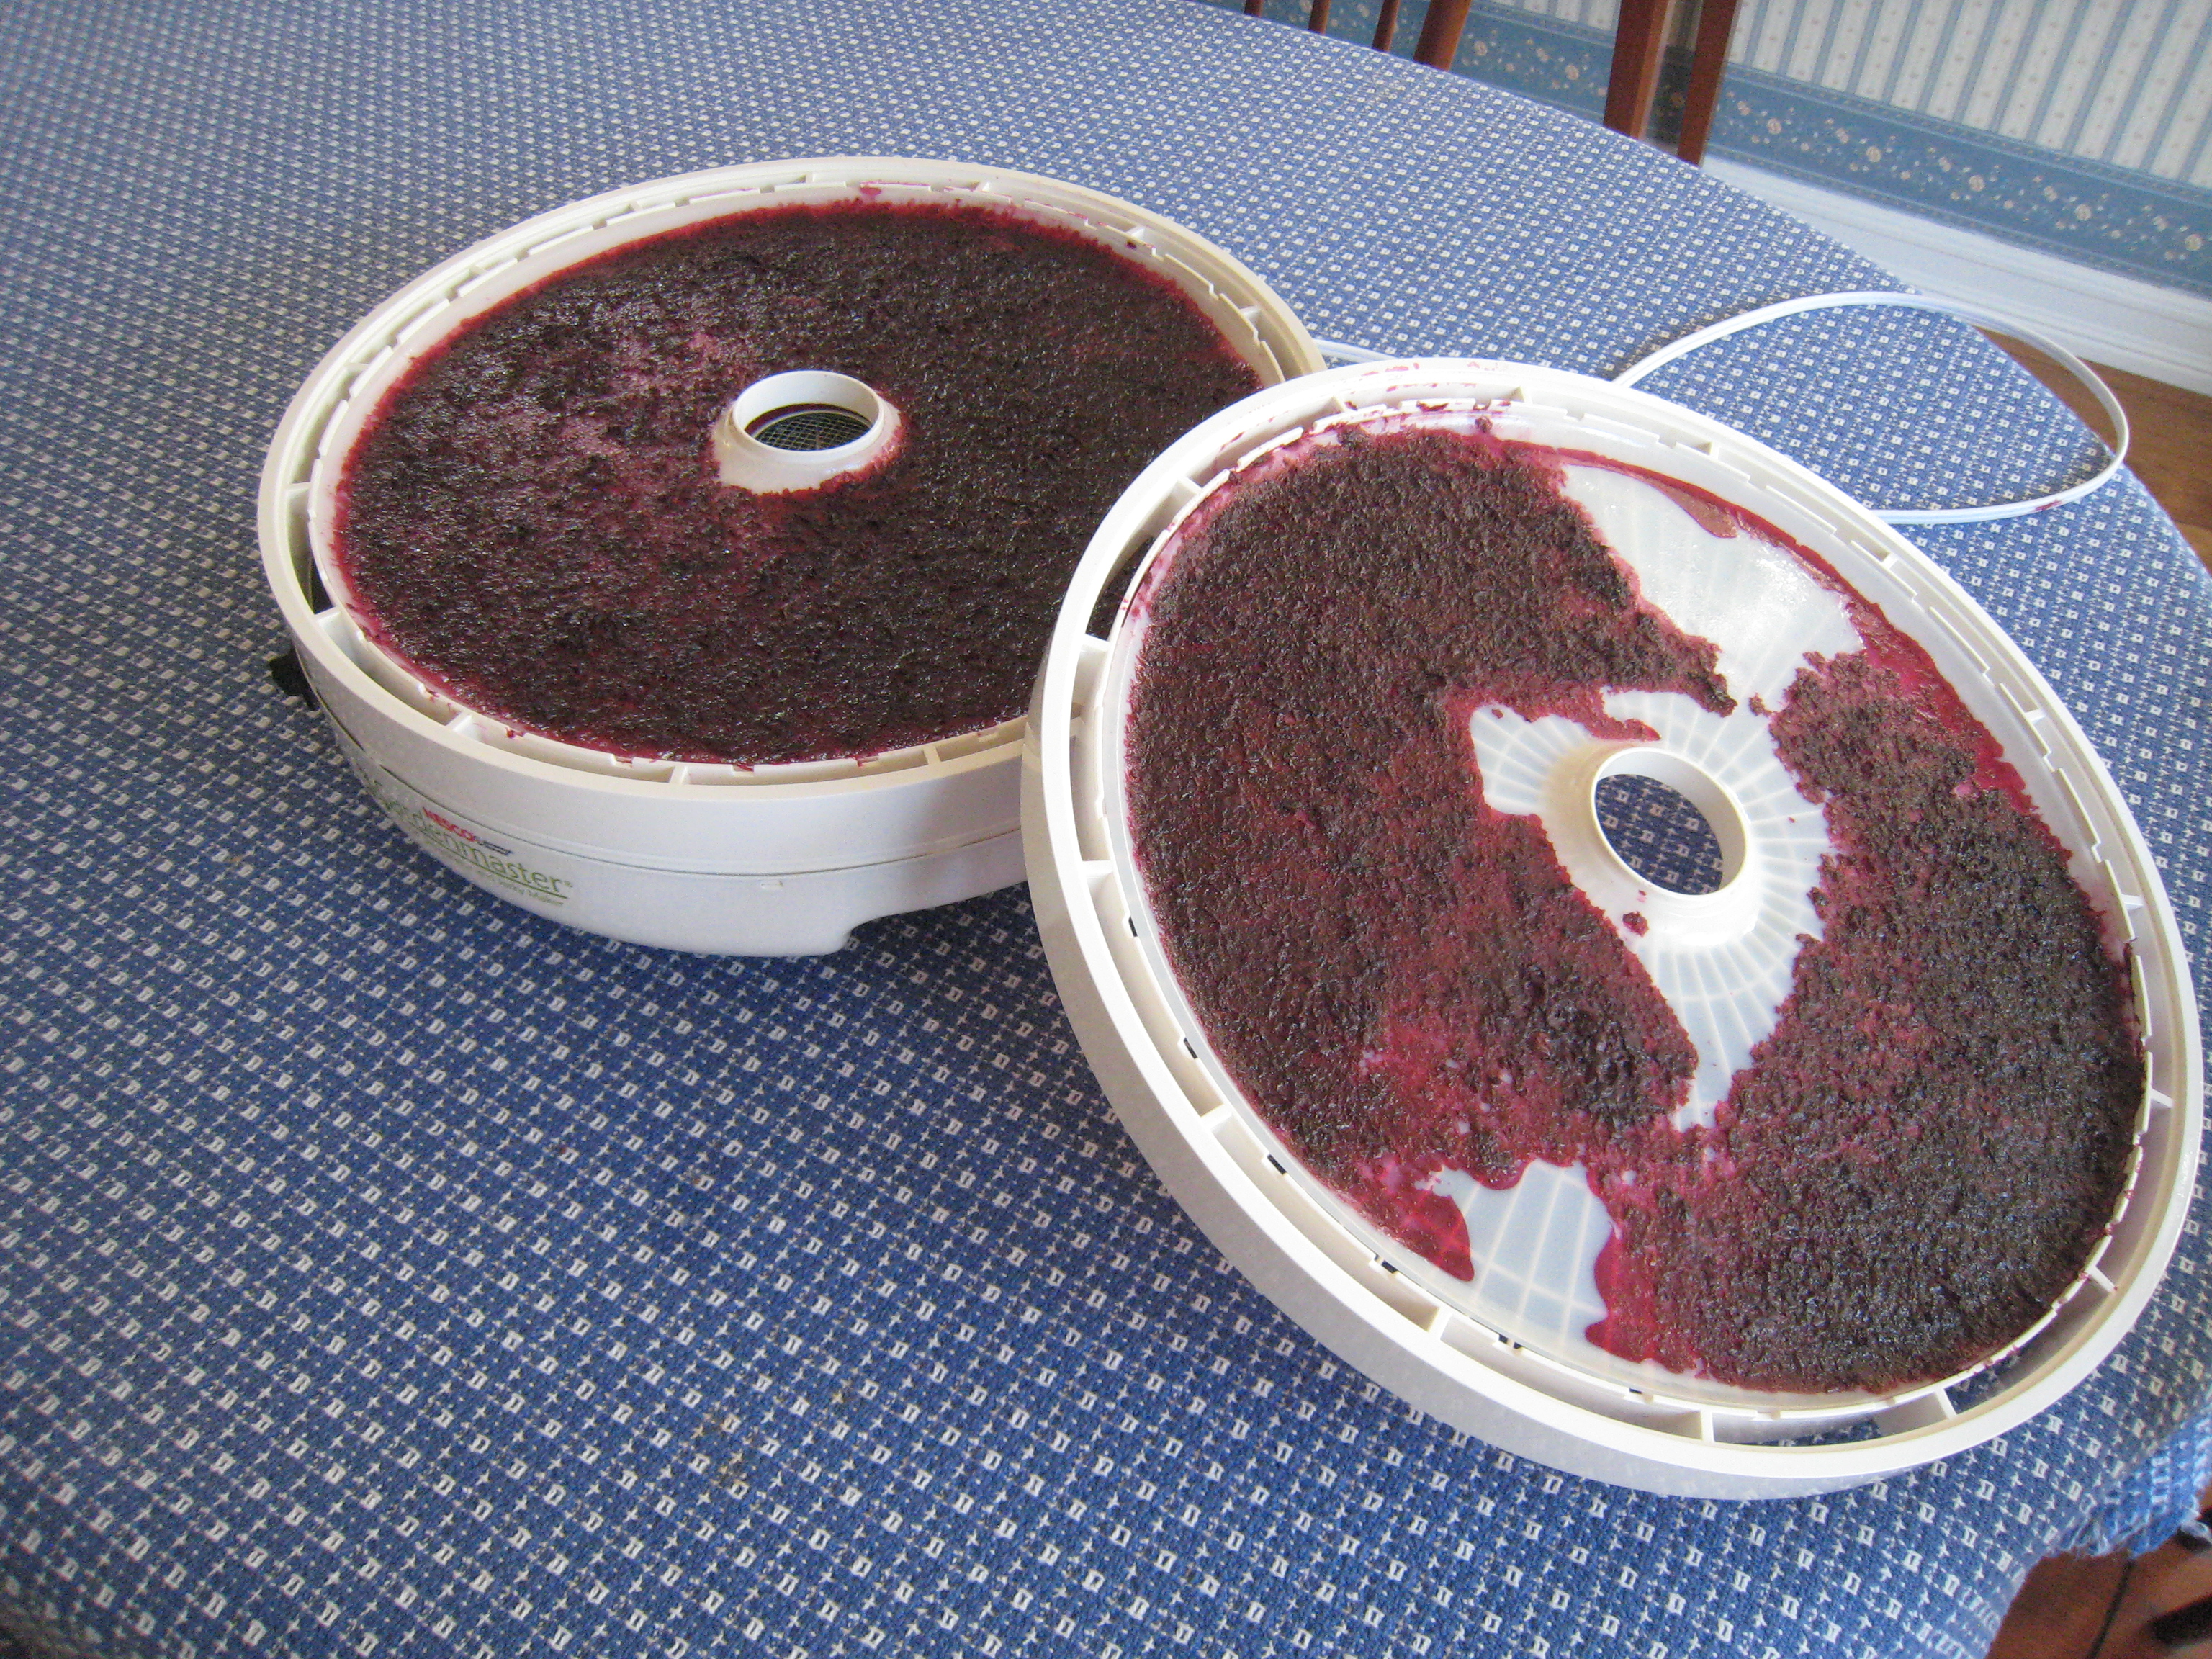
Concord Grape leather
Planning for Next Year’s Garden Already Underway
The mail just arrived. “Oh boy,” says The Gardener. “The Peaceful Valley catalog is here. It’s time to order garlic.”
“Organic Garlic – Pre-order Now” says the Peaceful Valley catalog
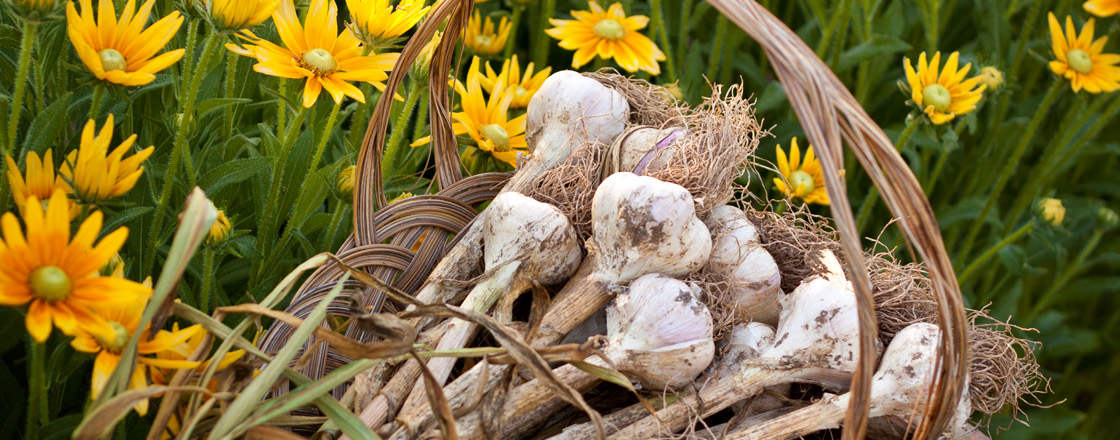
“Go easy,” says the Harvest Manager. “We still have lots of garlic left from this year.” (Readers will remember the recent post on Braiding Garlic.)
Managing the harvest also means managing next year’s planting. One approach to an over abundant harvest is to plant less. Another approach is to eat more. It’s hard to say how this one will play out. The Gardener has taken the catalog upstairs for perusal while the Harvest Manager hopes for the best.
Garlic Braids
Remember last year how The Gardener’s garlic crop failed? Read all about it. I wonder if it had anything to do with the fact The Gardener raided the kitchen for cloves to plant. I’ll have to ask him about that.
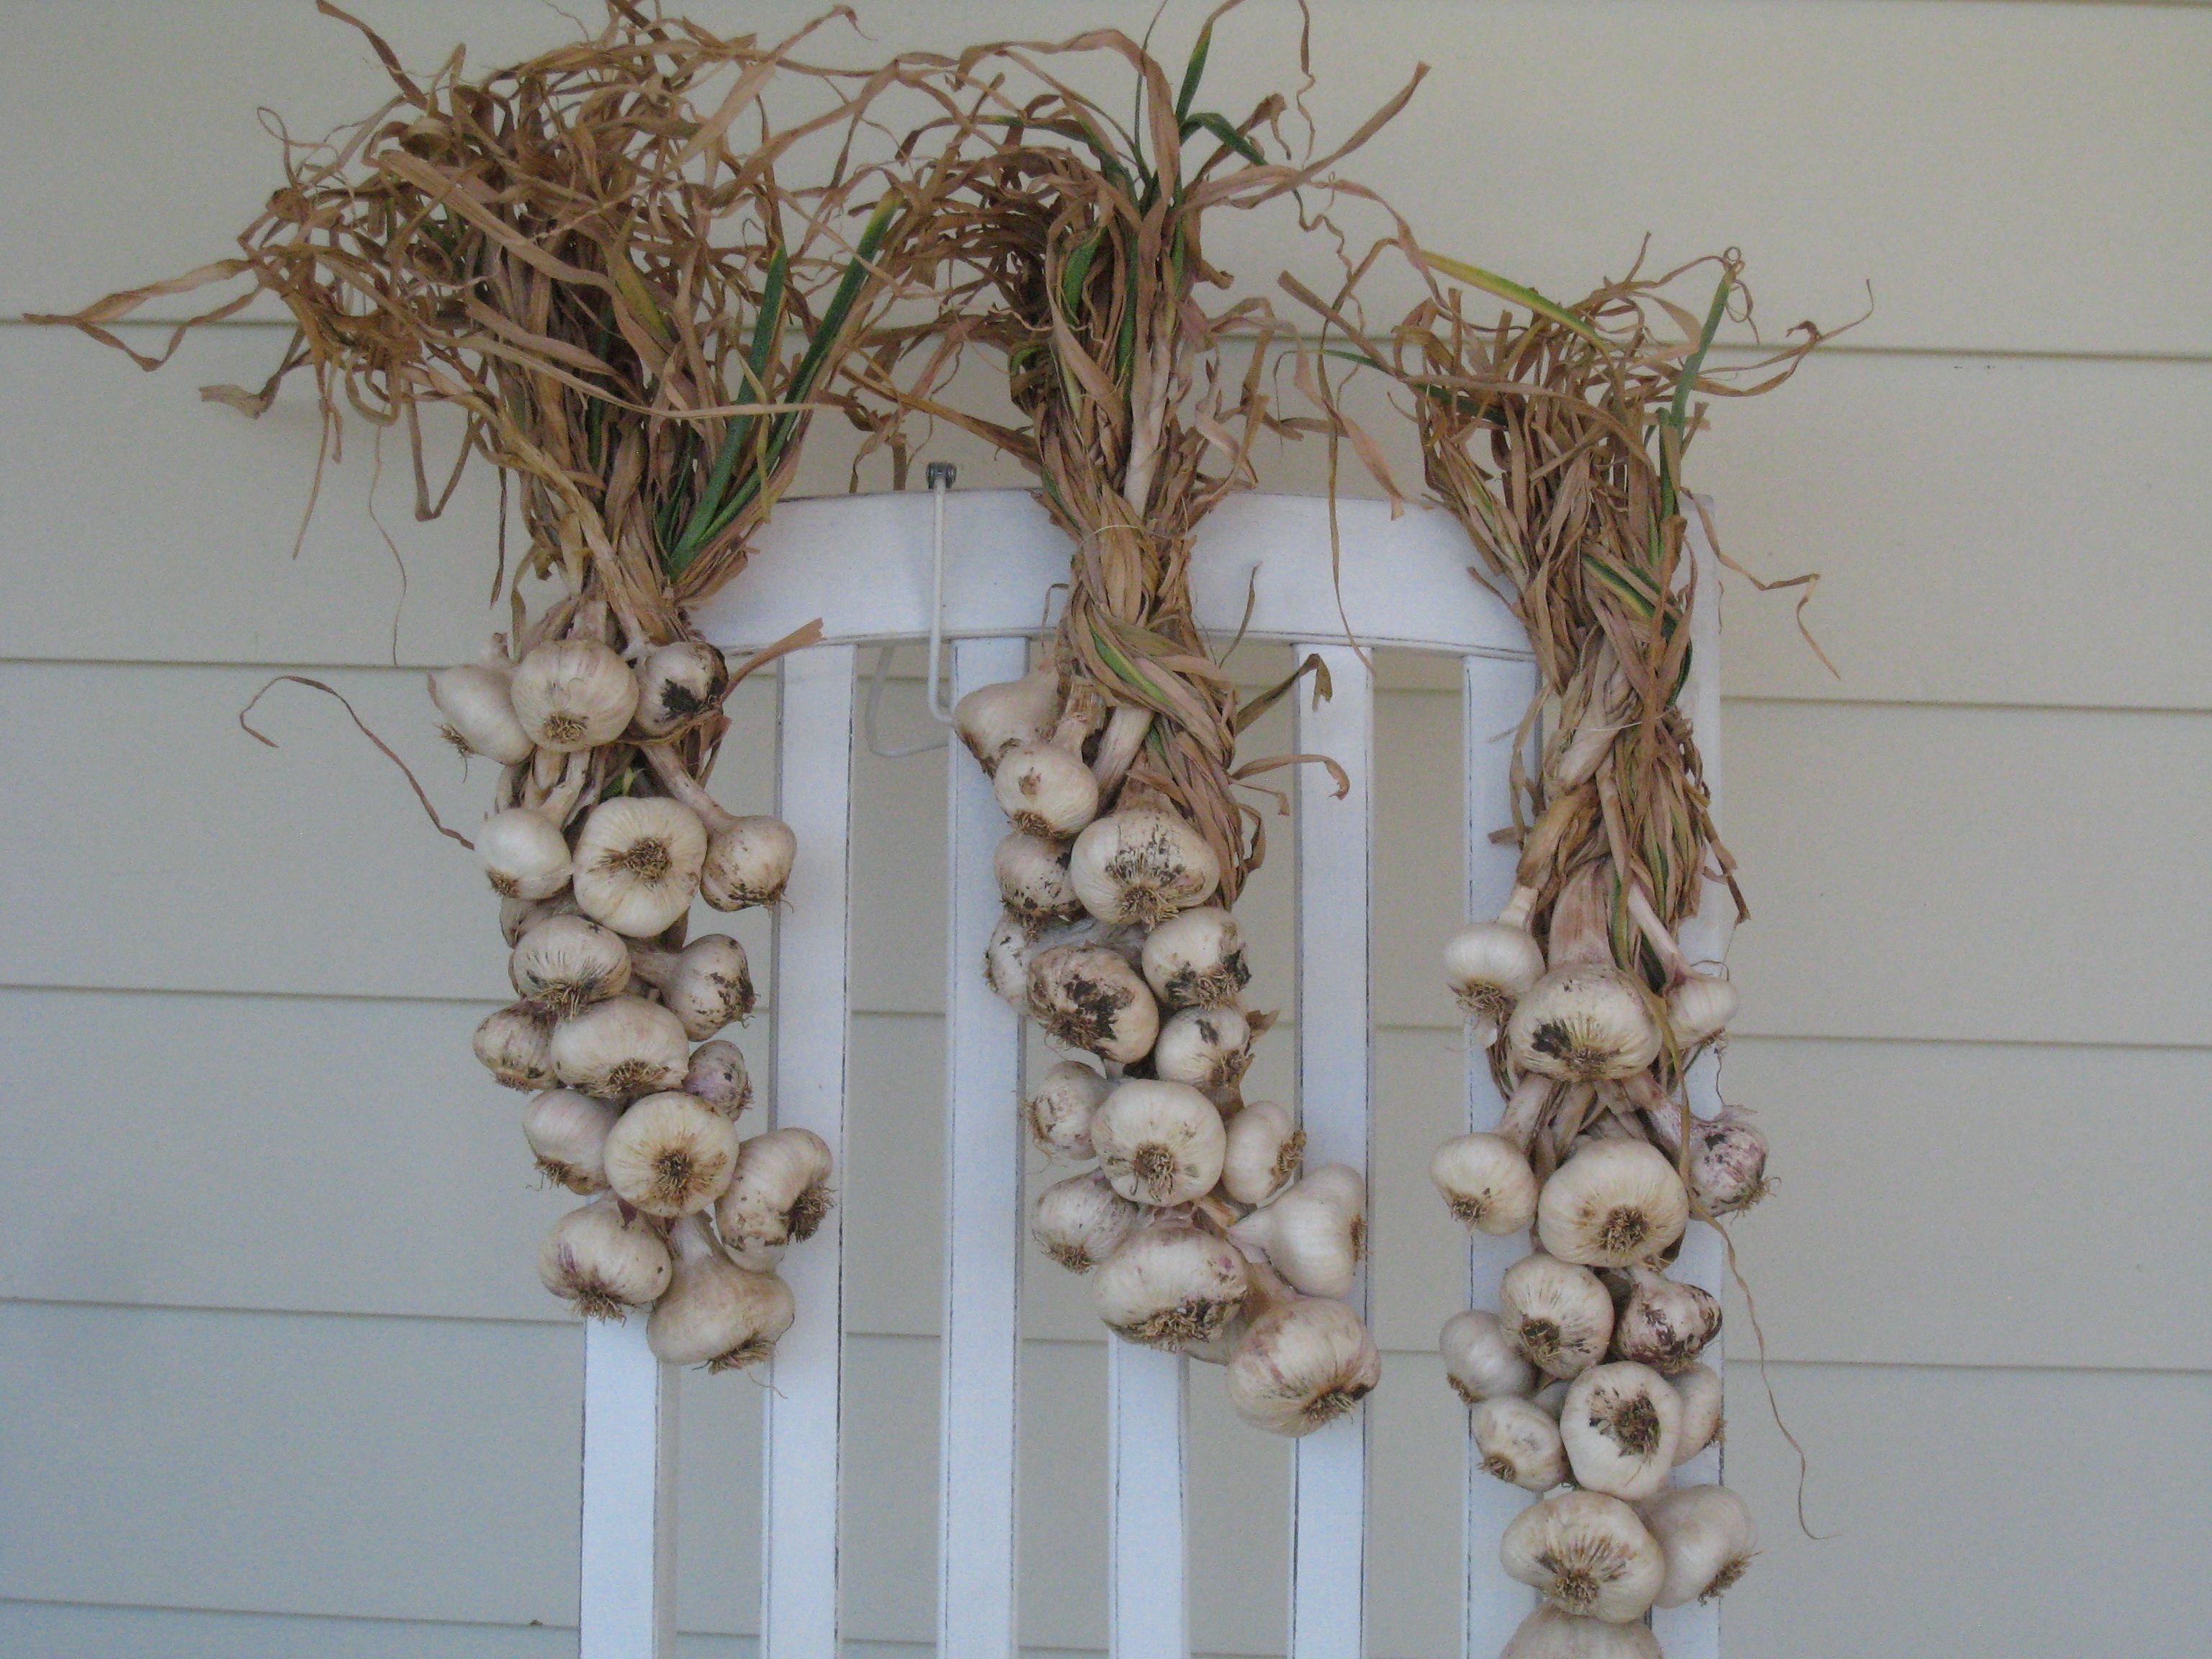
Garlic Braids
Anyhoo, this year things went much better. In fact, the Harvest Manager had a chance to practice garlic braiding. It went pretty well, if I do say so myself. Christy Wilhemi of Gardenerd.com has a really nice braiding demo posted on YouTube, and that’s the method I used.
Peach Jam – It’s Easier than You Think

Your basic ingredients
3 pounds of peaches
5 1/2 cups of sugar
2 tbs lemon juice
1 package of powdered pectin
I don’t ordinarily do product placement, but yes, those are the brands I use. I’ve been using Sure-Jell powered pectin for 35 years, and as the old saying goes, “if it ain’t broke, don’t fix it”. Since sugar is the main ingredient after the fruit, I chose a brand that I trust. (Did you know that C&H stands for California & Hawaiian?) As for jars, today I used a combination of Kerr and Mason jars. No brand loyalty there. If I need to buy jars I buy what the store carries.
I’m not going to repeat the recipe here, as I use the one that comes in the Sure-Jell insert. I do, however, have some advice.
1. Follow the recipe to the letter. Do not tinker with boiling times or sugar quantities. If you do, your jam is at risk. You may have pourable ice cream topping rather than firm, spreadable jam.
2. Chop or mash the fruit. As tempting as it may be to chuck it in the food processor, do not puree it. You want bits of fruit in the jam.
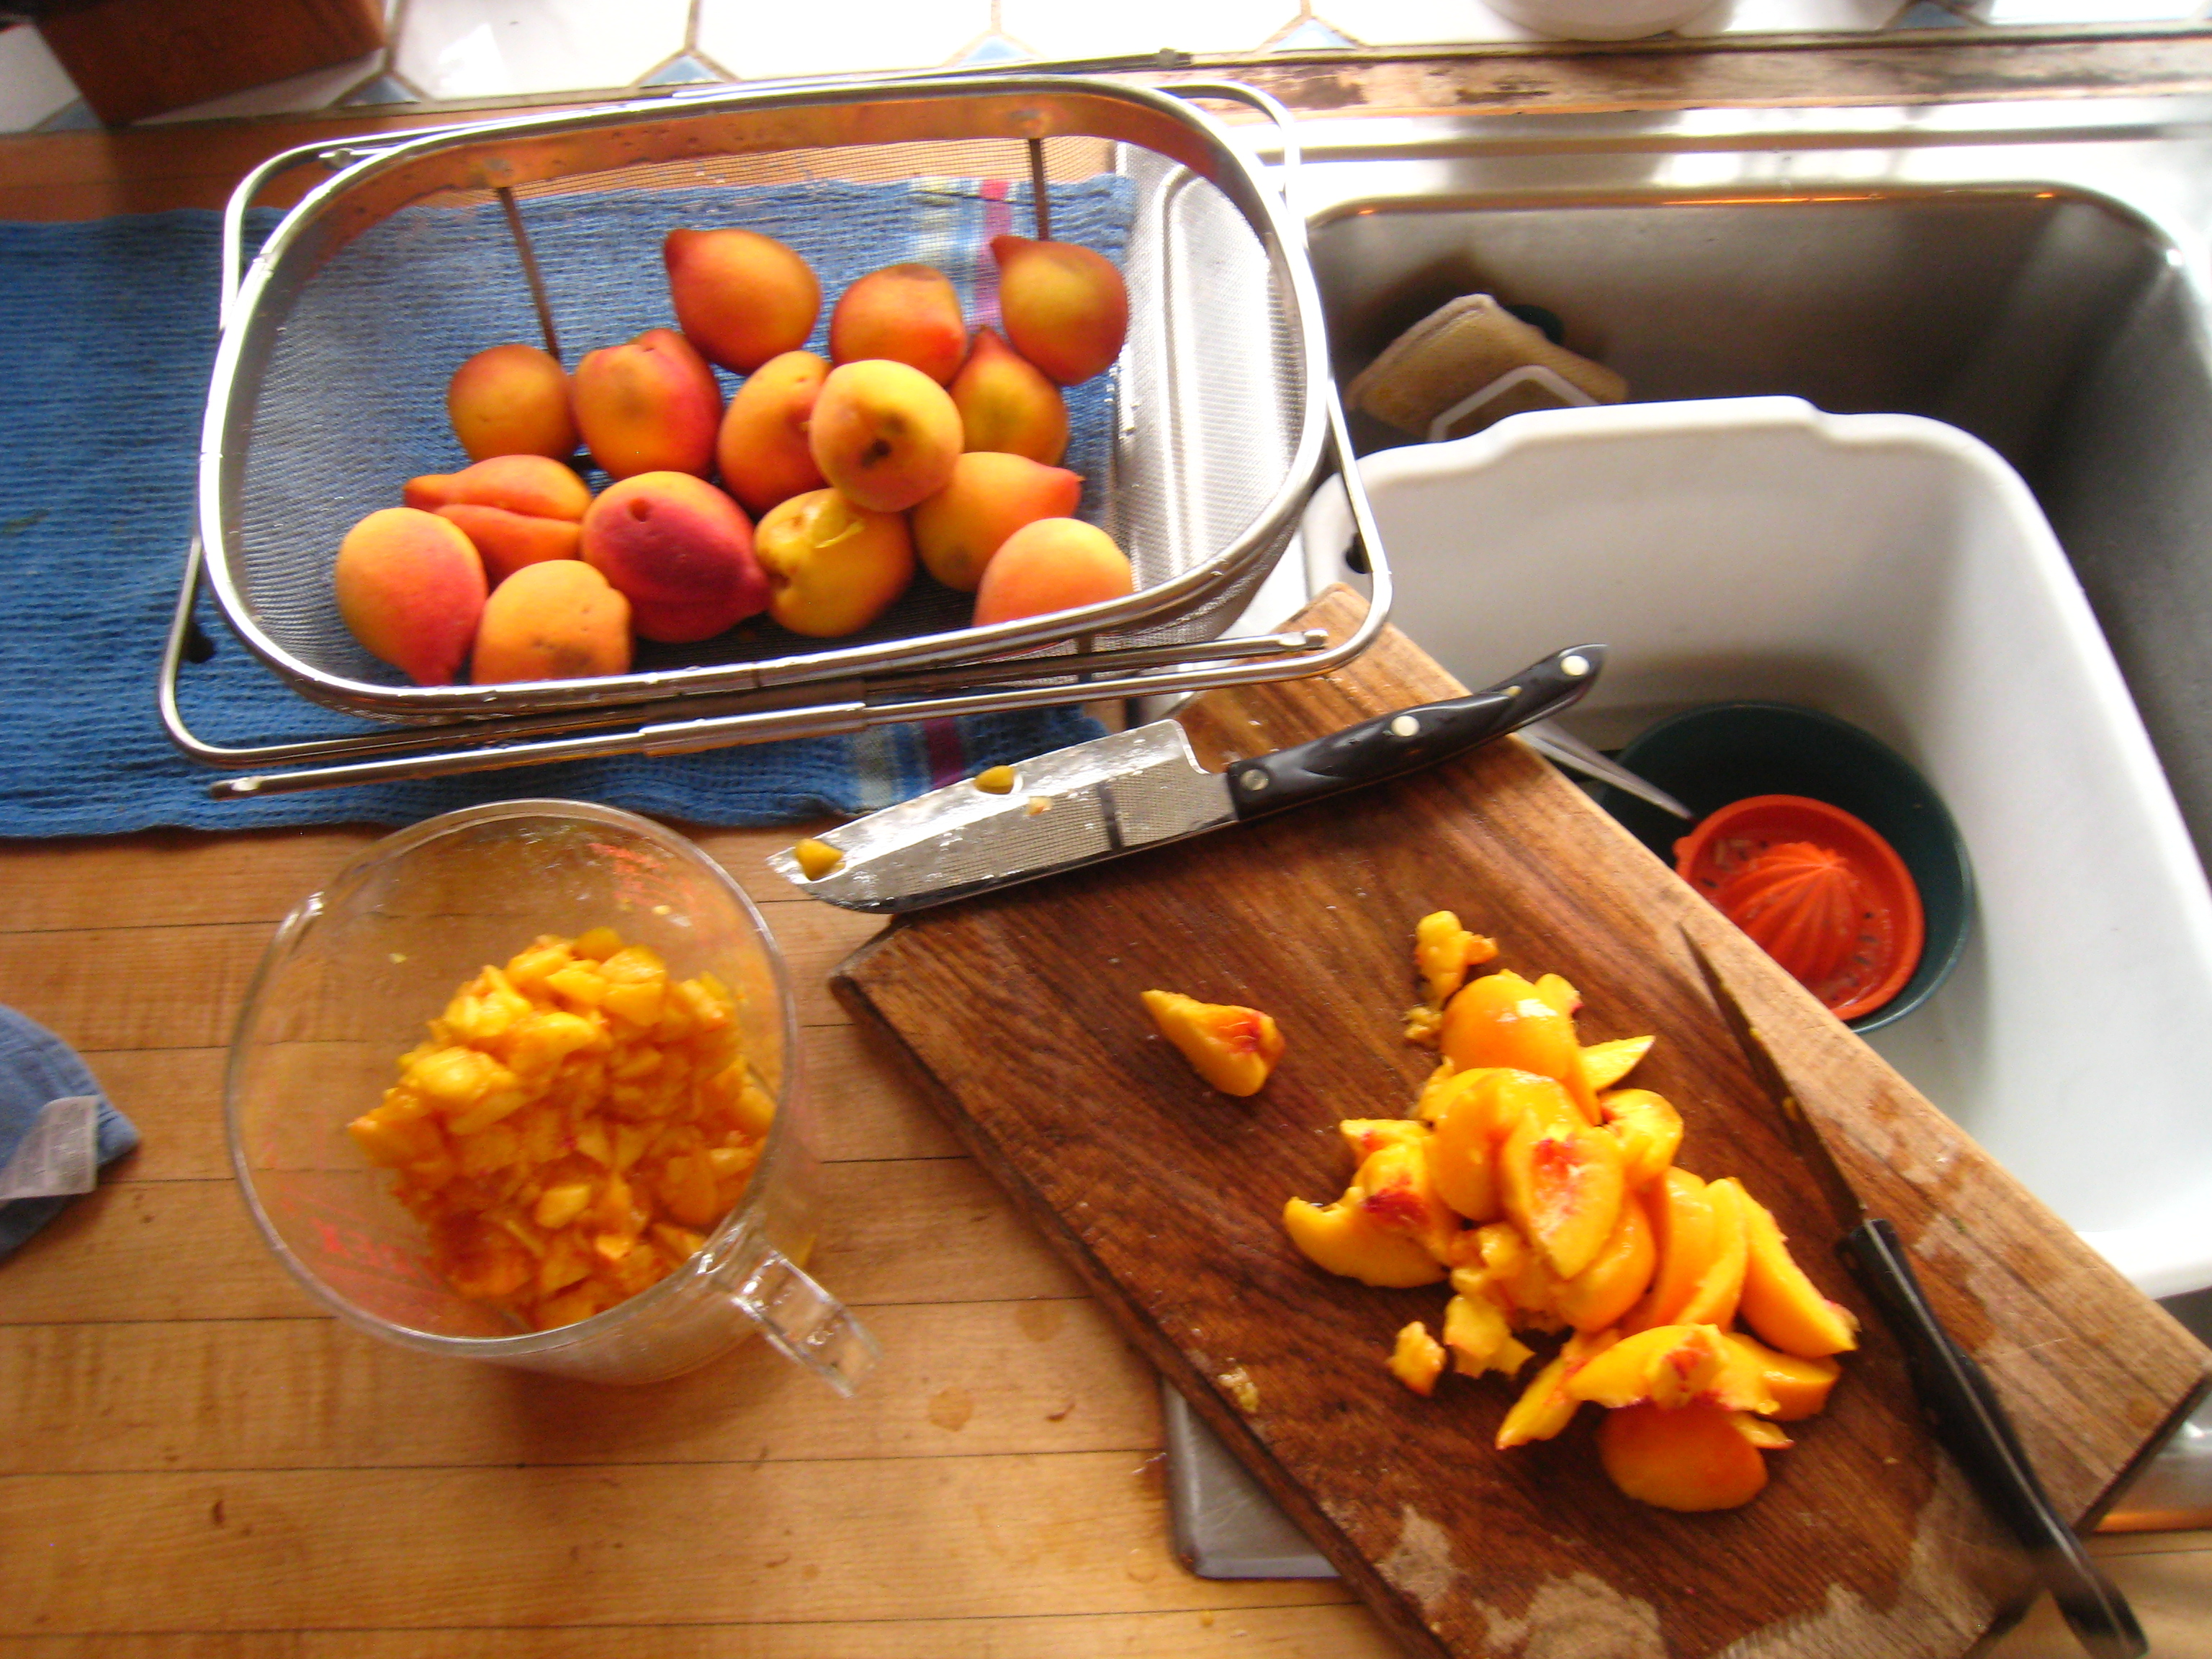
Peel, chop, measure.
Yes, that is my new Cutco knife that we bought at the county fair this year.
3. It’s OK if you do not have a canner to process the jam. You can store it in the fridge. Having said that I will note that one of the greatest sounds of summer is the popping of the lid on a canning jar when it seals itself.
4. Once the jam is in the jars, if the fruit tends to float or sink, wait until the jar is sealed and cool enough to touch then turn it over. Leave it this way for 10 minutes or so and then turn it back. Repeat if necessary.
Jam makes a great hostess gift and gives The Gardener an opportunity to share the details of pruning, thinning, and harvesting the crop.
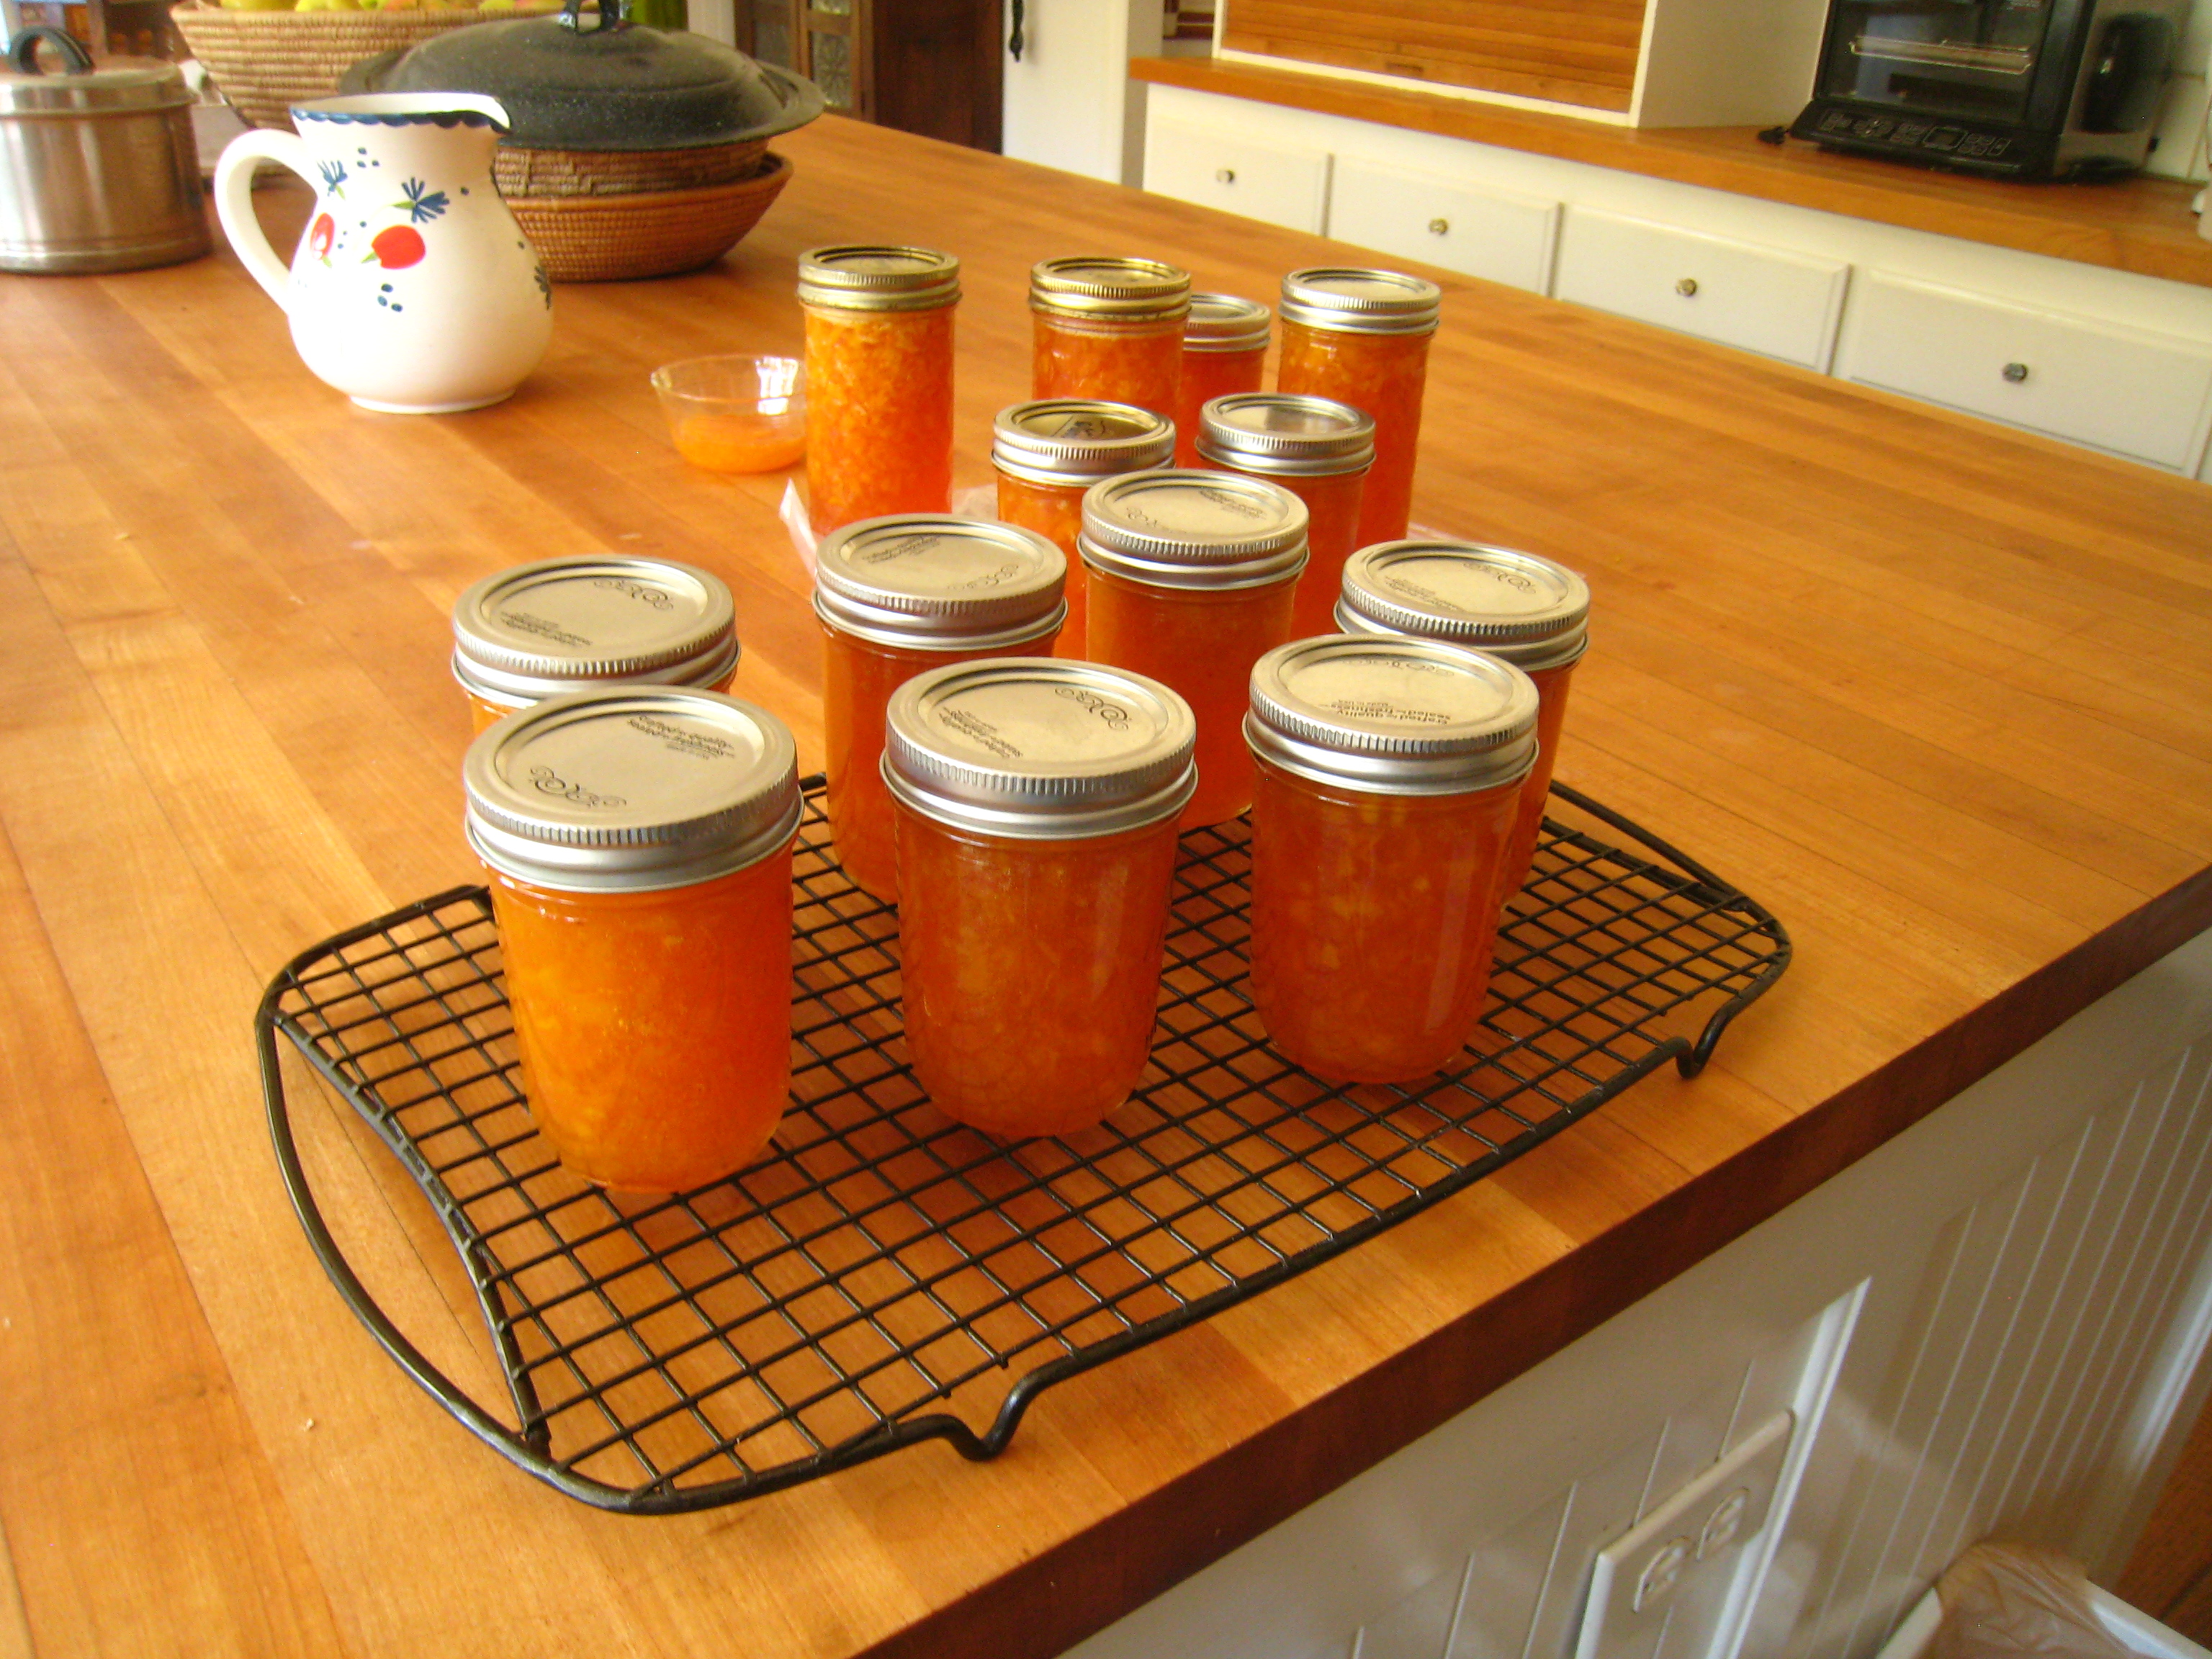
Ready to share or eat some yourself.
Onions, Onions, and More Onions
The onion harvest is complete, and the onions are safely stored away. In this particular case The Gardener took care of the entire process which includes picking, drying or curing, and storage. Of course he kept the Harvest Manager appraised each step of the way, seeking guidance on where to set up the drying table, announcing the intent to purchase specialized storage bags, and celebrating the arrival of said bags.
The ideal drying conditions will be in the shade with a light breeze to keep air moving over the onions. Thus, a table was set up outside in the shade of a coral tree where the
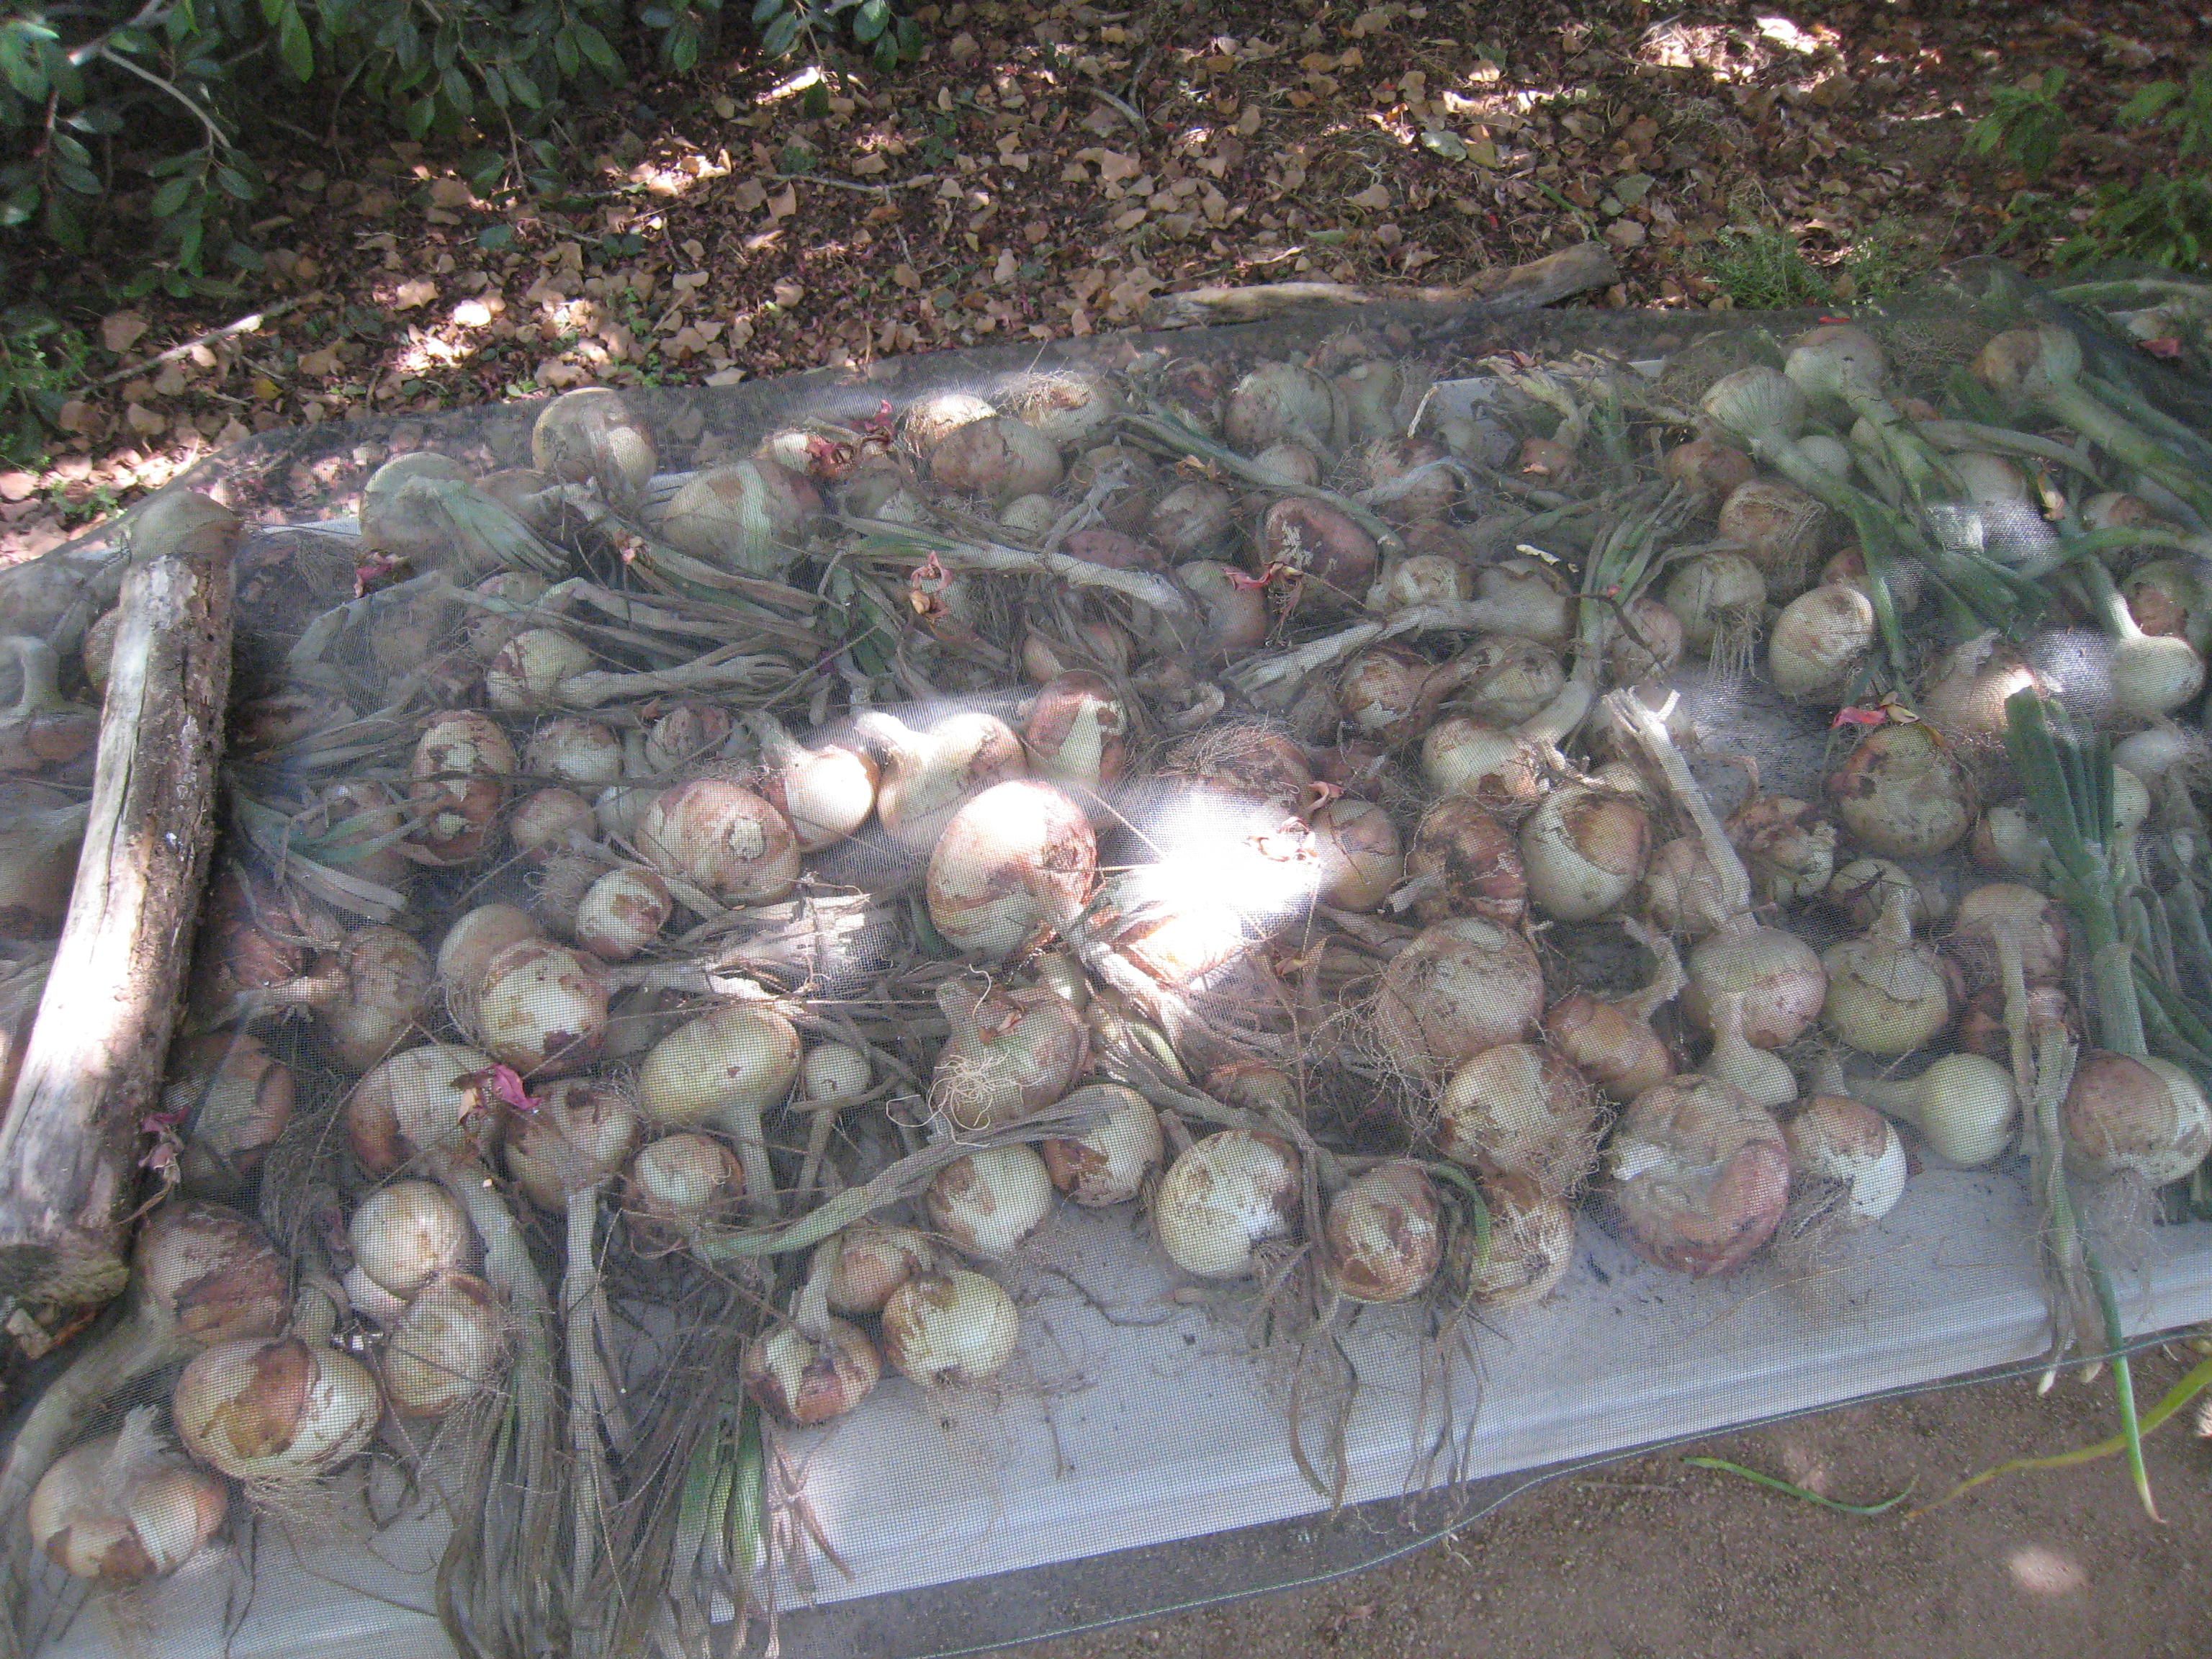
Onions drying in the shade. A bit of screening keeps the critters away.
onions could catch a light westerly breeze. The harvested onions took about two weeks to cure. The idea is to wait until the outer scales have dried and green tops have dried, basically sealing off the onion. At that point it’s safe to cut off the top and prepare for storage.
Onions (particularly the sweet varieties) store longest in a cool place with air circulating around the onion on all sides. Back in the day, the Harvest Manager used to use pantyhose for this purpose. Drop an onion into the toe, tie a knot above the onion, drop in another, tie a knot, and so on until the leg of the pantyhose was full of onions. Nowadays, the supply of pantyhose has dried up, like the top of an onion. The Harvest Manager certainly doesn’t wear them and knows no one who does.
Onion Mesh from Dixondale Farms
Enter the onion mesh storage system. These come from Dixondale Farms and cost about $1.00 each if you order 10 or more. Onions stored this way will keep for several months.
Now, to use the onions all you do is snip from the bottom.
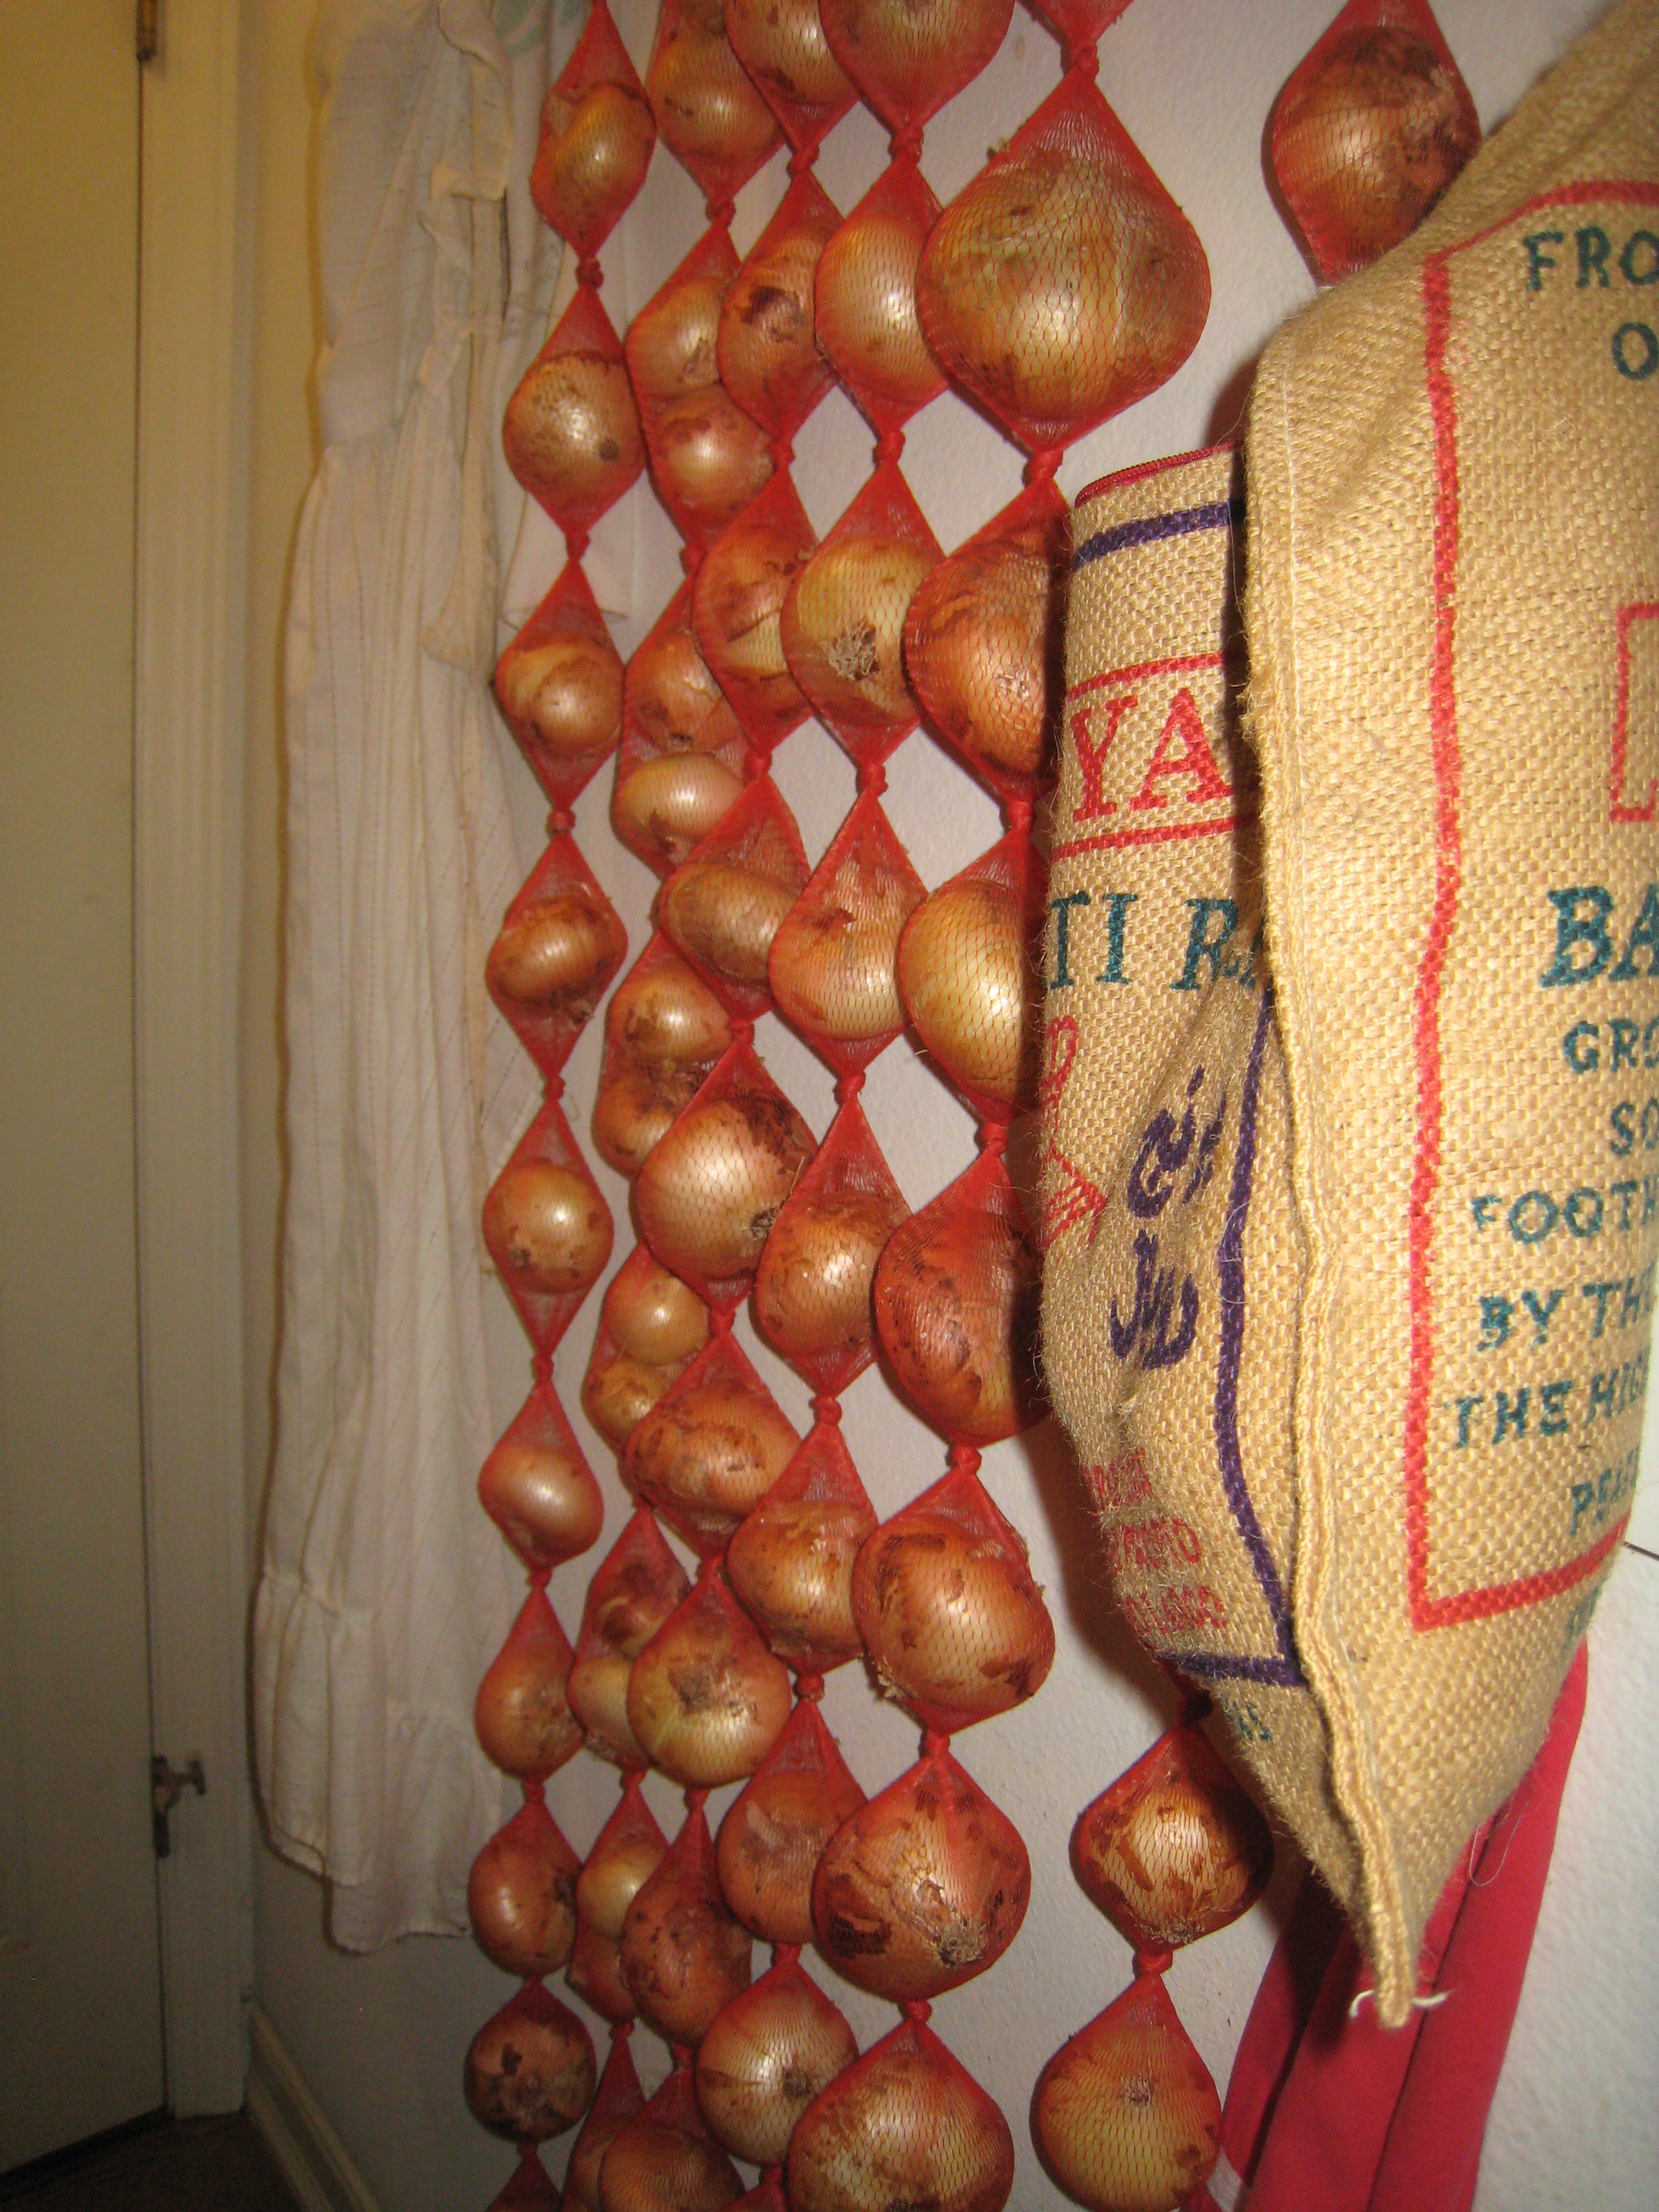
The burlap bag in the foreground contains the smaller onions that didn’t go into the mesh strings.
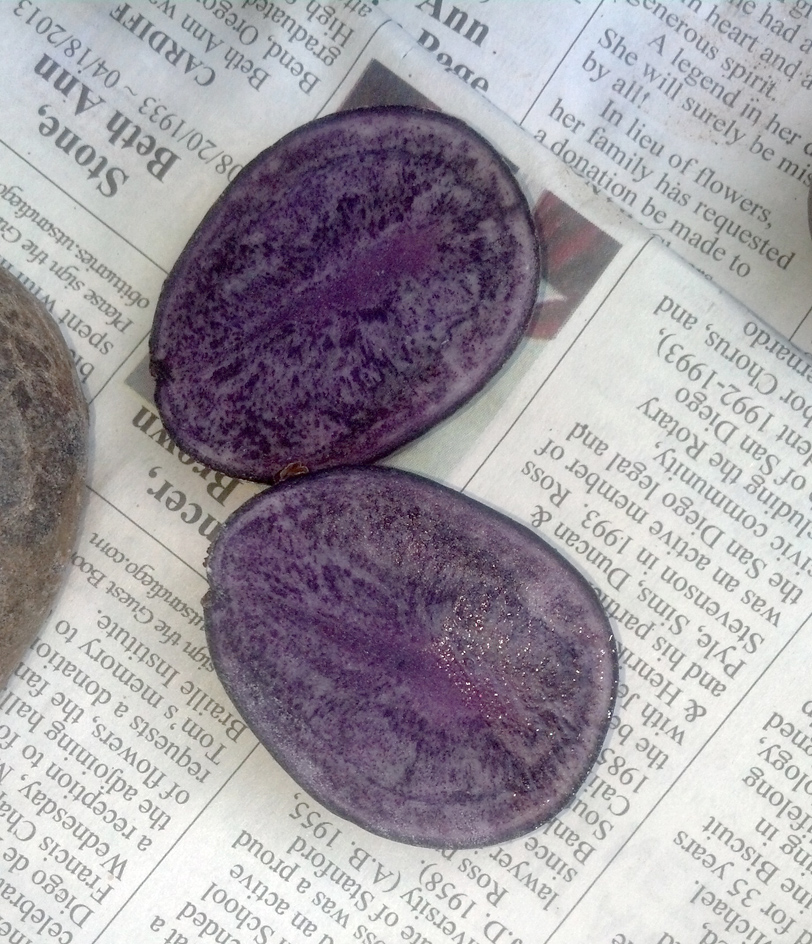
Purple Potatoes
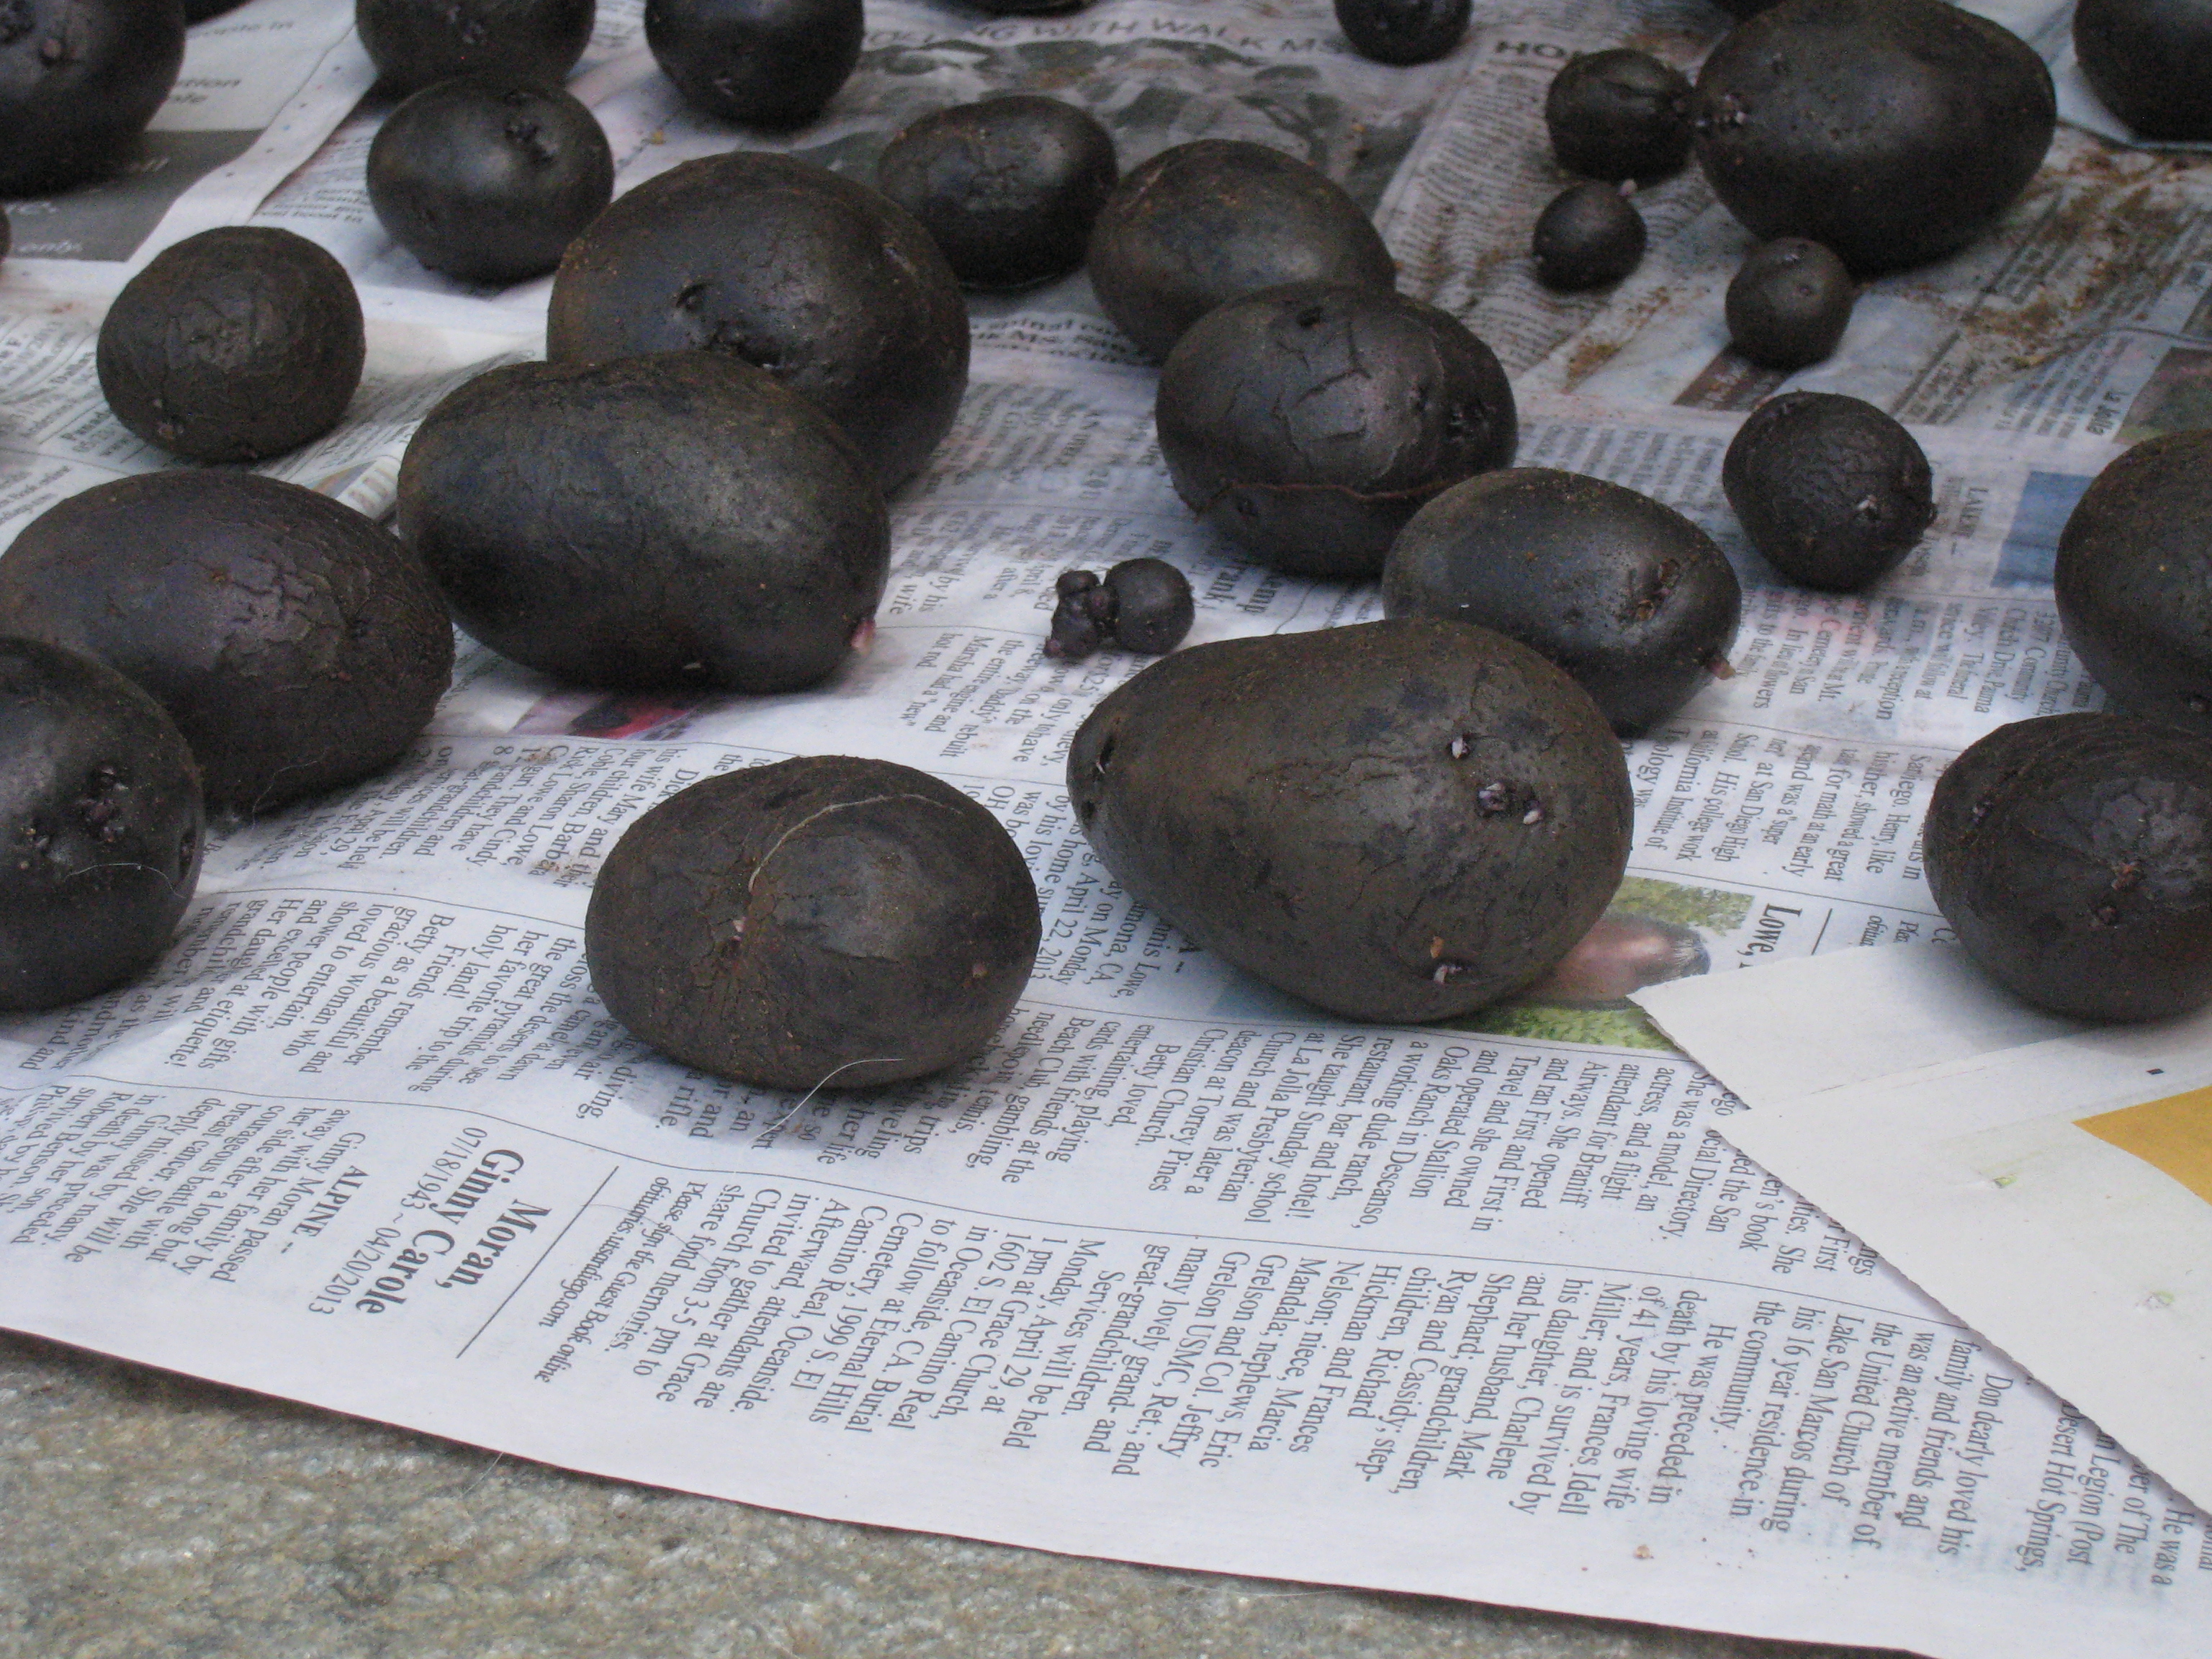 The Gardener just delivered a bucket of purple potatoes to the kitchen door. To my eye they look purple, but by all accounts they are called blue. In any case, they are actually quite lovely. Right now they are spread out on newspapers drying out.
The steps for preservation of the harvest are pretty straight forward. Wash. Spread potatoes out in the shade to dry.
Go on living your life for a day or two.
Check back to see if the potatoes have cured/dried.
Collect the potatoes and bring them into the pantry.
 Now that’s my kind of preservation process.